Category: Blog

  • Benefits of Spray Painting uPVC Doors: A 2026 Guide

    Benefits of Spray Painting uPVC Doors: A 2026 Guide

    Table of Contents

    Last Updated: October 4, 2026

    Why Spray Painting uPVC Doors Transforms Your Home

    Spray painting uPVC doors offers homeowners a cost-effective way to refresh their property without undertaking a full replacement. At Astral Coatings Ltd., we help property owners across Sussex discover that a professional spray finish can restore tired-looking doors to a factory-fresh appearance. The transformation goes beyond aesthetics, a quality spray coating provides durable protection against the elements whilst delivering the high-end finish that comes from professional application.

    Unlike traditional painting methods, spray application ensures even coverage across complex door profiles and hard-to-reach areas. This technique eliminates brush marks and creates a smooth, uniform finish that looks considerably more polished than DIY attempts. The process also means minimal disruption to your household.

    Many homeowners hesitate at first, unsure whether spray painting actually delivers lasting results. The answer depends entirely on proper preparation and technique, which is precisely where professional expertise makes the difference. A well-executed spray finish can protect your doors for years whilst maintaining that fresh appearance throughout.

    How Long Does uPVC Spray Paint Last on Doors

    A professionally applied spray coating typically lasts between 10 to 15 years on exterior uPVC doors, depending on exposure conditions and maintenance. Doors facing harsh weather, salt spray near coastal areas, intense UV exposure, or frequent temperature fluctuations, may see the finish fade or require touch-ups sooner than doors in more sheltered positions.

    The longevity of your spray finish depends on three critical factors. First, surface preparation determines whether the coating bonds properly to the uPVC. Inadequate cleaning or priming means the paint may peel or chip within months. Second, coating thickness matters significantly. A single thin coat looks good initially but won’t provide lasting protection. Professional application applies multiple layers at optimal thickness to ensure durability. Third, the quality of materials used directly impacts how long the finish remains intact.

    One common mistake homeowners make is assuming all spray finishes are equivalent. Budget-conscious approaches often skip proper primer or use low-grade topcoats, resulting in premature failure. Professional providers like Astral Coatings Ltd. use specification-grade materials designed specifically for uPVC, which bond properly and resist weathering far more effectively than generic paints.

    Maintenance extends the life of your spray finish considerably. Regular cleaning with mild soap and water prevents dirt accumulation that can degrade the coating. Avoiding harsh chemicals and abrasive materials protects the paint surface. Most well-maintained spray finishes on uPVC doors remain in excellent condition for 10 to 15 years.

    The uPVC Spraying Cost Guide: Investment vs Replacement

    Spray painting uPVC doors costs significantly less than replacement, though the exact investment depends on the number of doors, their condition, and local labour rates. Rather than stating specific figures, which vary considerably based on your individual circumstances, we recommend contacting Astral Coatings Ltd. directly for a personalised quote. Our team can assess your doors and provide accurate pricing once we understand the full scope of work required.

    The cost comparison becomes immediately apparent when you consider what replacement involves. New uPVC doors require removal of existing frames, disposal, installation, and potential structural adjustments. Spray painting, by contrast, happens very quickly, with minimal impact on your daily routine.

    Beyond the direct cost savings, spray painting preserves your existing door hardware, locks, and frames. Replacement means purchasing entirely new components, which adds considerably to the total expense. If your doors function properly but simply look tired, spray painting delivers the aesthetic refresh you want without unnecessary replacement costs.

    The real value of spray painting lies in the return on investment. A refreshed door improves your home’s kerb appeal, which matters when you eventually sell. Buyers perceive professionally finished doors as well-maintained, which can positively influence their perception of the entire property. For homeowners not planning to sell soon, the benefit is purely aesthetic, but that matters too, as you live with your front door every single day.

    Professional uPVC Spraying vs DIY: What Makes the Difference

    The difference between professional and DIY spray painting comes down to preparation, technique, and equipment. DIY attempts often fail not because the concept is flawed, but because homeowners underestimate the complexity involved. Surface preparation alone, cleaning, sanding, priming, determines whether paint adheres properly or peels within months. Most DIY projects skip critical steps to save time, resulting in disappointing results.

    Professional spray painters have invested in industrial-grade equipment that delivers consistent, fine atomisation. Consumer-grade spray cans and budget equipment cannot replicate this level of control. The result is visible immediately: professional finishes look smooth and uniform, whilst DIY efforts often show visible texture, runs, or uneven coverage. This difference isn’t subtle, it’s immediately apparent to anyone viewing your doors.

    Protecting surrounding surfaces during spraying requires systematic approach and experience. Spray mist travels further than most people expect, potentially coating windows, walls, and landscaping. Professional teams use dust sheets, masking tape, and containment systems to ensure only your doors receive paint. DIY sprayers often discover too late that overspray has damaged nearby surfaces, leading to additional cleanup or repair costs.

    The three-step spraying process that Astral Coatings Ltd. employs demonstrates how professional methodology differs from casual approaches. Proper priming creates a base layer that ensures paint adhesion. Intermediate coats build protection and colour depth. Final topcoats deliver the finish quality and weatherproofing that determines how long your doors look fresh. Skipping or rushing any step compromises the entire result.

    The Three-Step Spraying Process Explained

    Professional spray painting of uPVC doors follows a methodical three-step process designed to ensure optimal adhesion, coverage, and durability. Understanding this process explains why professional results outlast DIY attempts and why the investment in proper technique pays dividends.
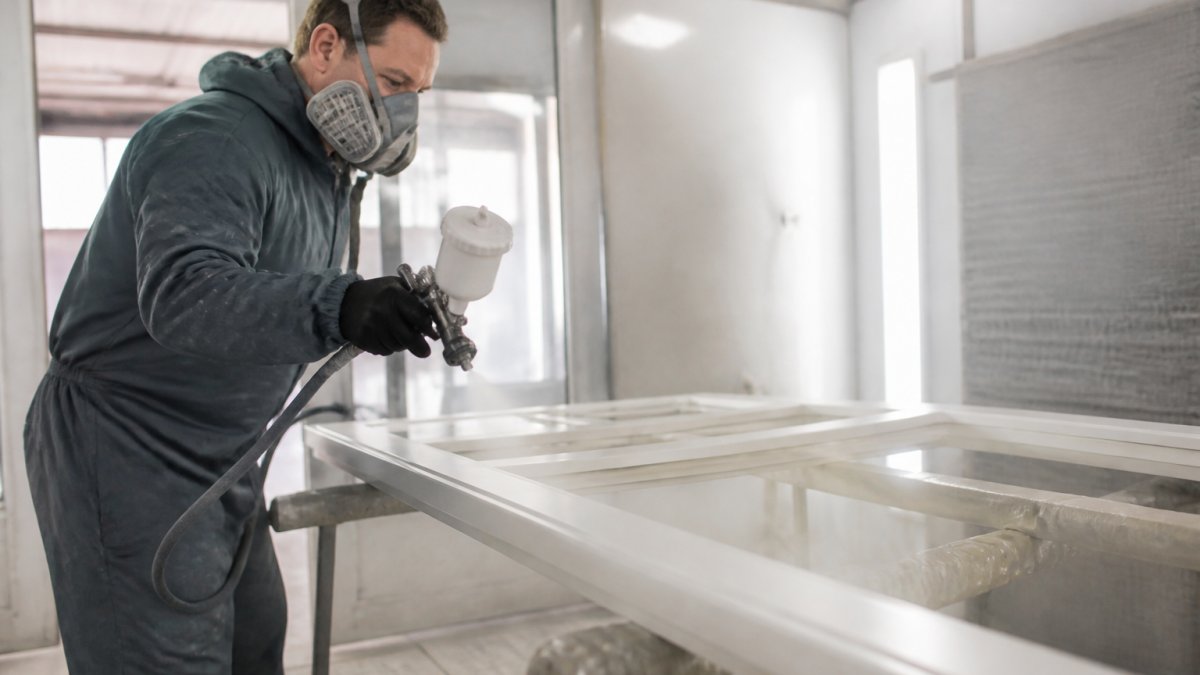
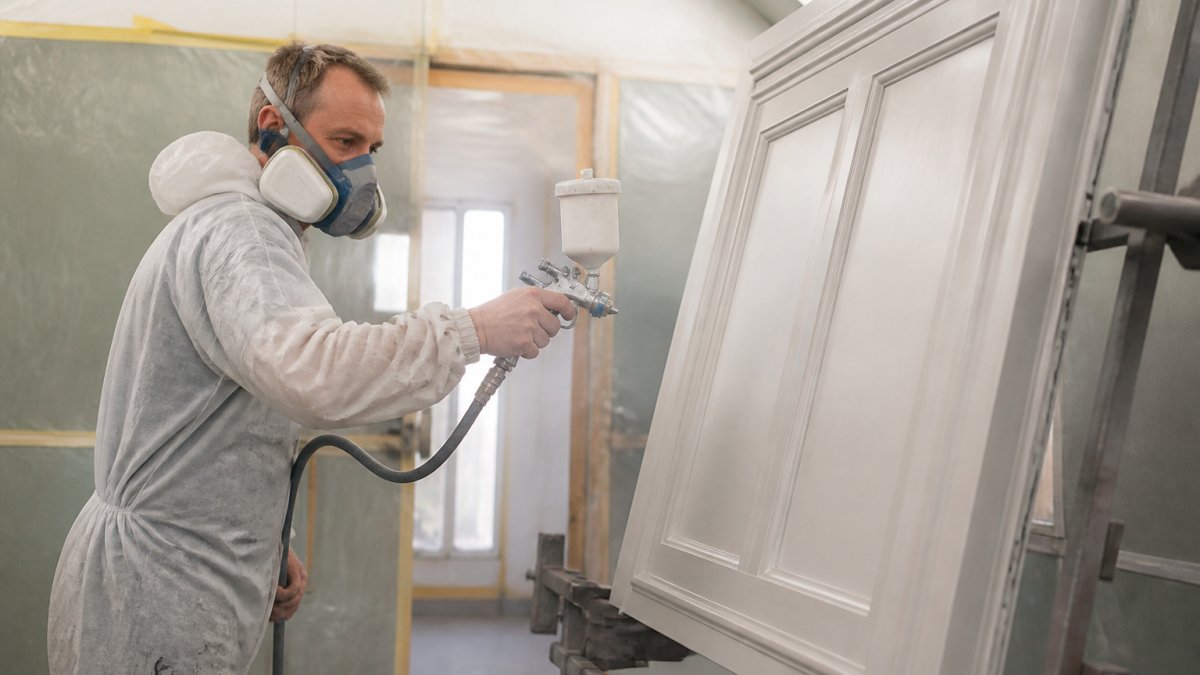
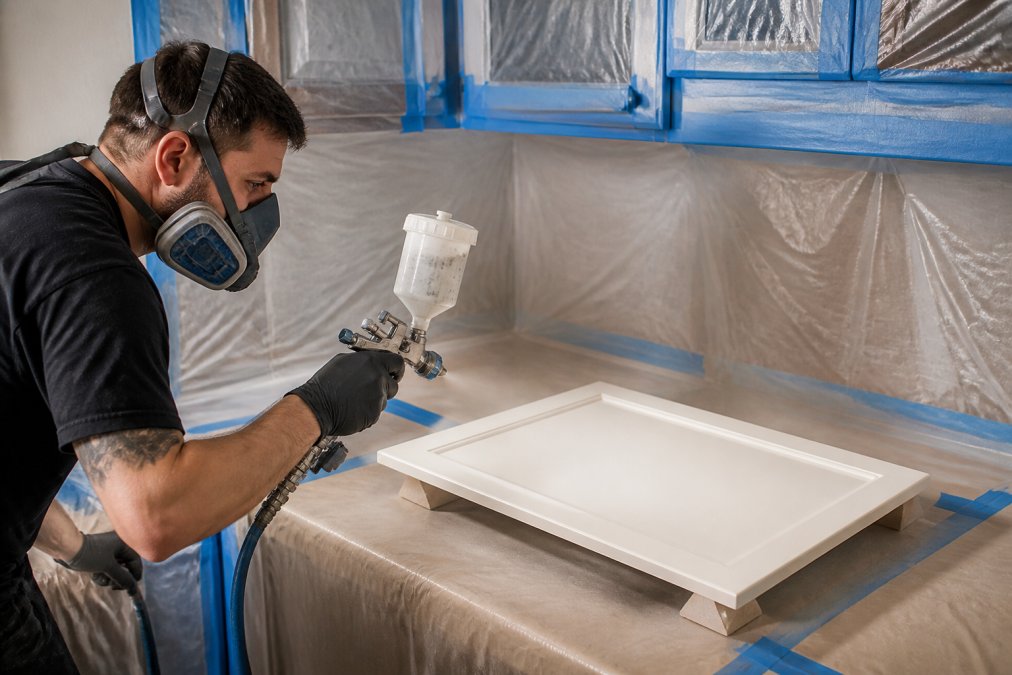
    Professional spray painter wearing protective gear and respirator, carefully applying coating to uPVC door frame with precision spray equipment in bright workshop setting
    Professional spray painter wearing protective gear and respirator, carefully applying coating to uPVC door frame with precision spray equipment in bright workshop setting

    The first step involves thorough surface preparation. Your doors are cleaned to remove dirt, dust, and oxidised material that would prevent paint adhesion. Any damaged areas are identified and addressed. A primer coat is then applied, which creates a chemical bond between the uPVC and subsequent paint layers. This step cannot be rushed, inadequate priming is the primary reason DIY spray jobs fail prematurely.

    Contact us on WhatsApp →

    The second step applies the base colour coat. This layer establishes the finish colour and begins building the protective barrier. Professional application ensures even coverage across all surfaces, including the recessed areas of door profiles that brush painting struggles to reach effectively. The spray method deposits paint uniformly, creating consistent colour depth across the entire door.

    The final step applies a protective topcoat that provides weatherproofing and UV protection. This layer shields the colour coat from fading and protects against moisture penetration. The topcoat determines how long your doors maintain their fresh appearance when exposed to sun, rain, and temperature changes. Quality matters substantially at this stage, specification-grade topcoats resist degradation far more effectively than budget alternatives.

    Each step requires proper drying time between applications. Rushing this process compromises the bond between layers and reduces overall durability.

    Common Concerns About Spray Painting uPVC Doors

    Homeowners frequently ask whether spray painting actually works on weathered uPVC or whether the process will damage surrounding surfaces. These concerns are legitimate, understanding what’s realistic helps you make an informed decision.

    The question of whether spray painting works on worn doors has a straightforward answer: yes, provided the underlying uPVC is structurally sound. Fading and discolouration don’t prevent successful spray painting. However, doors with significant cracking, warping, or structural damage may not be suitable candidates. A professional assessment can determine whether your specific doors will benefit from spraying or whether replacement makes more sense.

    Surface protection during spraying is a legitimate concern, particularly if you have expensive landscaping or vehicles nearby. Professional teams use systematic masking and containment to prevent overspray. Dust sheets, plastic sheeting, and careful technique ensure that only your doors receive paint. This protection is standard practice for professional providers like Astral Coatings Ltd., not an optional extra.

    Another common question involves disruption to your household. Unlike renovation work that might involve weeks of noise and dust, spray painting typically requires only a day or two. Your doors will be unusable whilst wet, but drying happens quickly. Drying happens quickly.

    Some homeowners worry about whether spray paint will match existing colours if they only paint doors and not surrounding trim. A skilled professional can advise on colour coordination and help you choose shades that complement your home’s existing palette. If colour matching is important, discuss this during your initial consultation.

    Is Spray Painting Your uPVC Doors Right for You

    Spray painting suits homeowners who want to refresh their property’s appearance without major expense or disruption. If your doors are functionally sound but visually tired, spraying delivers excellent results. If you’re planning to sell your property soon, a refreshed front door improves kerb appeal and buyer perception without requiring capital expenditure on full replacement.

    Spray painting is less suitable if your doors have structural problems, warping, broken seals, or locks that no longer function properly. In these cases, replacement addresses the underlying issues rather than simply masking them cosmetically. Similarly, if you’re planning a comprehensive renovation that involves replacing windows and other exterior elements, coordinating the entire project might be more efficient than spraying doors alone.

    The decision ultimately depends on your specific situation. Budget-conscious homeowners benefit significantly from spray painting, as the cost savings compared to replacement are substantial. Property owners seeking quick aesthetic improvements find that spray painting delivers results in days rather than weeks. Those concerned about household disruption appreciate that professional spraying minimises impact on daily life.

    For homeowners in the Sussex area considering whether spray painting makes sense for their property, we recommend consulting with professionals who can assess your doors and discuss your goals. At Astral Coatings Ltd., we guide property owners through this decision, helping them understand whether spray painting or replacement better suits their circumstances. Our experience across interior and exterior spray finishing means we can evaluate your doors and recommend the approach that delivers the best outcome for your investment.


    Refreshing tired uPVC doors needn’t mean accepting dated aesthetics or committing to expensive replacement projects. Spray painting offers homeowners a practical alternative that delivers professional results without the cost and disruption of full renovation. At Astral Coatings Ltd., we specialise in transforming worn doors through our meticulous three-step spraying process, which ensures optimal coating thickness and durable weatherproof finishes that protect your investment. Our team, trained at the Dulux Academy and Llewellyns of Brighton, understands the specific requirements of uPVC spraying and applies that expertise to every project. Contact us on WhatsApp to discuss your door refresh and discover how professional spray finishing can restore your home’s appearance.

    Frequently Asked Questions

    How long does spray painted uPVC actually last on doors?

    Professional spray painting on uPVC doors typically lasts 10-15 years with proper maintenance, depending on exposure to weather and sun. A three-step process, which includes surface preparation, primer application, and topcoat, ensures optimal coating thickness for durability. Regular cleaning and avoiding harsh chemicals extend the lifespan significantly.

    Is it cheaper to spray paint uPVC doors or replace them entirely?

    Spray painting costs considerably less than replacement, typically a fraction of the price for new doors. Exact pricing depends on door size, condition, and finish complexity, so contact for a tailored quote. Replacement involves purchasing new frames and installation labour, all substantially more expensive. Spraying offers a cost-effective way to refresh your doors’ appearance without the disruption of removal and reinstallation.

    Will spray painting my uPVC doors damage my kitchen worktops and appliances?

    Protective coverings shield worktops, appliances, and fixtures from overspray. The process requires minimal household disruption, making it ideal for those working from home or with busy schedules.

    Can spray painting work on old, weathered uPVC doors?

    Yes, professional spraying works on weathered frames provided they’re structurally sound. The preparation stage removes dirt, oxidation, and surface degradation, restoring the door to a factory-fresh appearance. However, severely damaged frames with cracks or rot may require replacement instead. A professional assessment determines whether your specific doors are suitable for spraying or if replacement is more appropriate.
  • Avoiding Dust During Kitchen Cabinet Spraying

    Avoiding Dust During Kitchen Cabinet Spraying

    Table of Contents

    Last Updated: October 2, 2026

    Why Dust Control Matters When Spraying Kitchen Cabinets

    Avoiding dust during kitchen cabinet spraying isn’t just about aesthetics. A single dust particle settling on wet coating can ruin hours of work.

    Dust nibs, those tiny specks embedded in the finish, are nearly impossible to sand out without damaging the underlying coat. Prevention is always cheaper and faster than repair. When you spray without proper dust control, you’re essentially gambling with your investment.

    The good news: controlling dust during spraying is entirely achievable with the right preparation. It doesn’t require expensive equipment or professional-grade facilities. It requires discipline and a systematic approach.

    Here’s what separates a professional-looking finish from a disappointing one: preparation. Most people spend 20% of their time preparing and 80% spraying. It should be the opposite.

    Preparing Your Space: The Foundation for Dust Prevention

    Your spray environment matters more than your spraying technique. A dusty workshop will produce a dusty finish, no matter how skilled you are.

    Start by identifying your work area. Ideally, you’ll spray in a space where you can control air movement and seal off external dust sources. A garage with the door closed works. A kitchen with open windows does not.

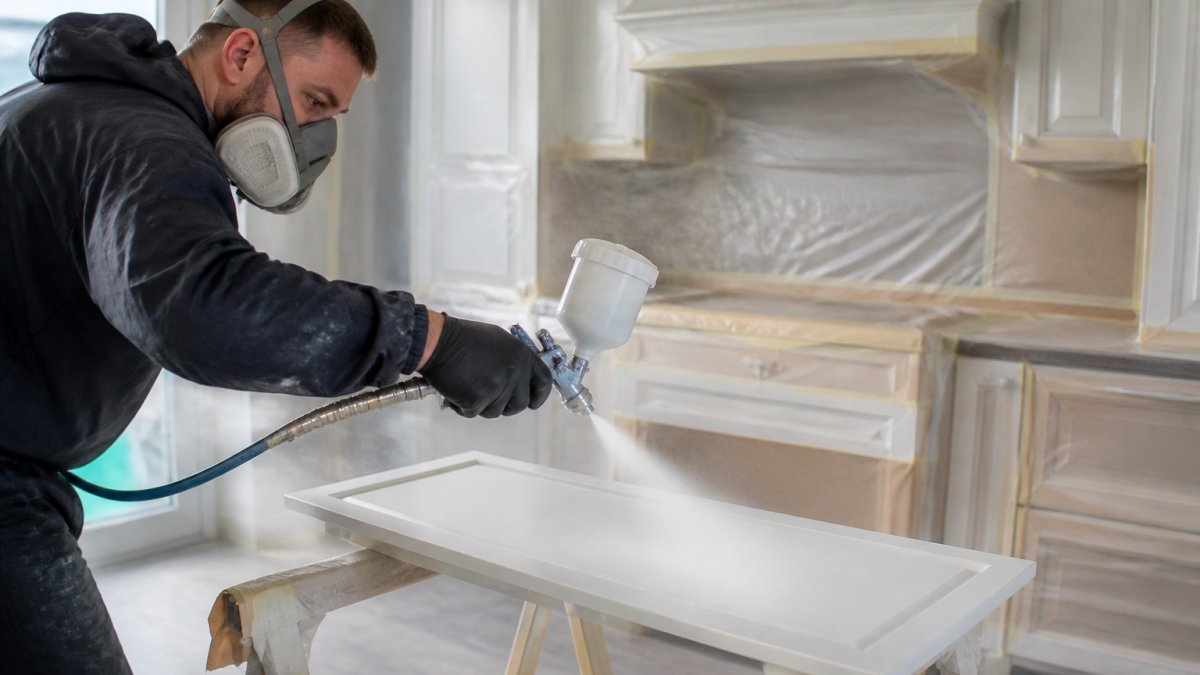
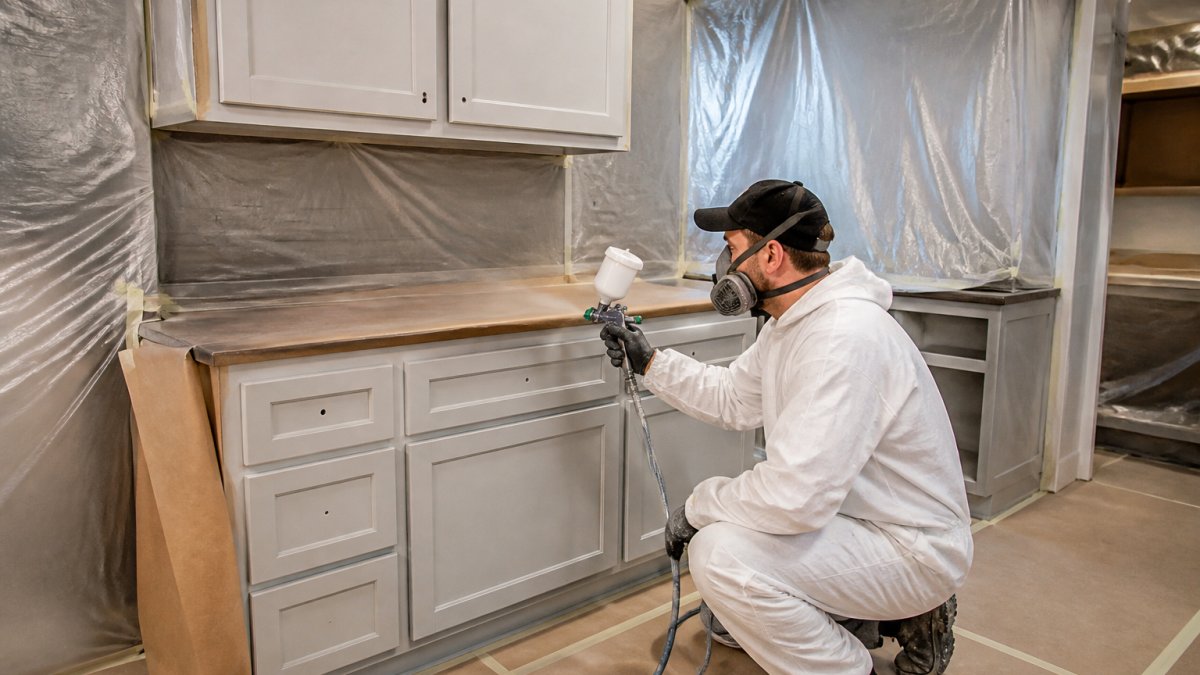
    Professional demonstrating avoiding dust during kitchen cabinet spraying technique in modern clinical setting with natural lighting
    Professional demonstrating avoiding dust during kitchen cabinet spraying technique in modern clinical setting with natural lighting

    Isolating the Work Area

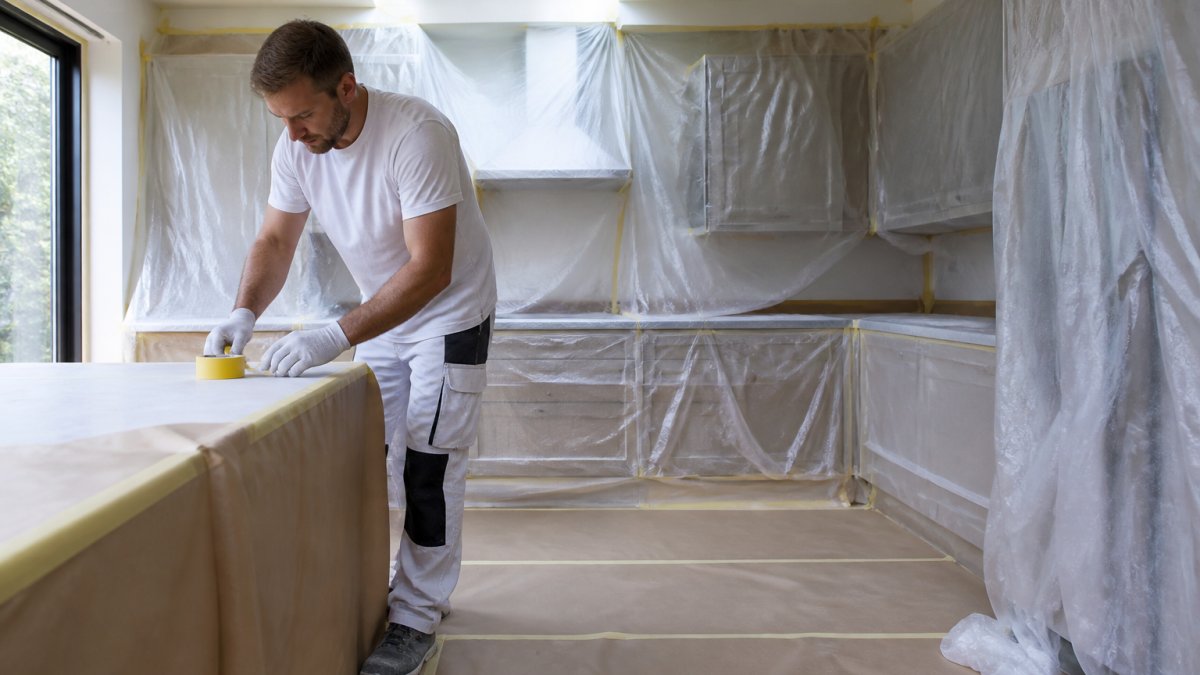
    Seal your workspace completely. Use plastic sheeting to create barriers between your spray area and the rest of the property.

    Cover doorways, windows, and any openings with heavy-duty plastic. Tape it down with masking tape. Leave no gaps. Even small openings allow dust to drift in during spraying.

    Remove everything unnecessary from the room:

    • Furniture
    • Soft furnishings
    • Cardboard boxes
    • Anything that collects dust

    If you must keep items in the space, cover them with plastic sheeting. Dust travels on air currents. A sealed workspace prevents external dust from entering and traps airborne particles you create during sanding.

    Managing Air Movement

    Air movement can work for you or against you. Uncontrolled air creates dust clouds. Controlled air removes them.

    If you have extraction equipment, position it to pull air away from your work surface. Point it toward a window or outside. Never let air recirculate into the spray area.

    In a sealed garage, open a window slightly on one side only. This creates gentle, directional airflow rather than chaotic turbulence. Air moves in one direction and out the other.

    Avoid fans that blow air around the room randomly. They stir up settled dust and create swirling patterns that coat your cabinets with particles.

    Humidity matters too. Dust clings to moisture. In very dry conditions, dust floats freely. In humid conditions, it settles faster.

    How to Sand Kitchen Cabinets Without Making a Mess

    Sanding creates more dust than any other step. How you sand determines how much dust you’ll fight during spraying.

    Wet sanding eliminates airborne dust entirely. Dampen the cabinet surface lightly with a spray bottle before sanding.

    Use fine-grit sandpaper, 220 grit or higher. Coarse grits create larger dust particles that are harder to control.

    Sand in the direction of the wood grain. This produces less dust than sanding against the grain.

    If you’re sanding by hand, work slowly. Rushing creates friction heat, which makes dust more likely to become airborne.

    For larger cabinet runs, consider a sanding block with dust extraction.

    After sanding, vacuum thoroughly. Use a vacuum with a HEPA filter, it captures fine dust particles that standard vacuums miss.

    Cleaning Cabinets Before Spraying: Essential Steps

    Clean cabinets are the foundation of dust-free spraying. Any residue left on the surface will be visible under wet coating.

    Removing Loose Debris and Surface Contaminants

    Start with a vacuum and brush. Remove all loose dust, cobwebs, and debris from the cabinet surfaces, edges, and corners.

    Use a soft-bristled brush to dislodge dust trapped in grain or textured surfaces. Work systematically across each cabinet door and frame.

    Wipe down with a damp cloth, not wet, damp. Water removes dust without raising the wood grain. Use a lint-free cloth. Regular cloths shed fibres that will end up in your finish.

    For cabinets with grease or cooking residue, use a mild degreaser. Spray it on, let it sit for two minutes, then wipe clean. Rinse with a damp cloth to remove any degreaser residue. Let the surface dry completely, at least 30 minutes in normal conditions.

    Using the Best Tack Cloth for Cabinet Painting

    A tack cloth is your final defence against dust. It’s a sticky cloth that picks up particles no vacuum or damp cloth can reach.

    Use a dedicated tack cloth made for paint preparation. These are available from any decorating supplier. Unfold it gently, they tear easily. Wipe the entire cabinet surface with light pressure. The cloth picks up microscopic dust particles that would otherwise land in your wet coating.

    Replace the cloth when it becomes saturated with dust. One cloth typically covers 3-4 cabinet doors before it’s full.

    Do this immediately before spraying. Don’t wait. Dust settles constantly. The longer you wait between tacking and spraying, the more dust lands on your “clean” surface.

    Contact us on WhatsApp →

    Protecting Surrounding Surfaces During Application

    Spray travels further than you think. Overspray drifts onto nearby surfaces and settles.

    Mask everything around your work area. Use masking tape and plastic sheeting to create a perimeter. Extend the protection at least 1.5 metres in all directions.

    Cover worktops with plastic sheeting taped down at the edges. Protect appliances with plastic bags or sheeting. Cover the floor with heavy-duty plastic or dust sheets.

    Mask cabinet interiors if you’re only spraying the doors and frames. Overspray inside cabinets creates a rough finish that’s visible when doors open.

    Use painter’s tape on edges where you want a clean line. Press it down firmly so coating doesn’t seep underneath. Remove tape while the coating is still tacky, not after it dries. Dried coating can peel away with the tape.

    The Spraying Process: Minimising Dust Exposure

    During spraying, dust is your constant enemy. Keep the spray area sealed and undisturbed.

    Close all doors and windows before you start. Don’t open them during spraying. Every time a door opens, dust-laden air rushes in.

    If you have extraction running, keep it on throughout the process.

    Spray in smooth, overlapping passes. Jerky movements create turbulence that stirs up dust.

    Apply thin coats rather than thick ones. Thick coats take longer to dry, giving dust more time to settle into the wet finish.

    Between coats, resist the urge to open doors and check your work. Wait until the coat is fully dry. Dust exposure during drying ruins the finish.

    If dust does land on a wet coat, don’t try to wipe it off. You’ll create a larger defect.

    Removing Dust Nibs From Sprayed Finish

    Despite your best efforts, the occasional dust nib will appear. Removing dust nibs from sprayed finish requires patience and the right technique.

    Wait until the coat is completely dry before attempting removal. Sanding wet or tacky coating creates a larger defect.

    Use fine-grit sandpaper, 400 grit or higher. Sand gently around the dust nib in a circular motion. The goal is to sand the nib flush with the surrounding surface without creating a depression.

    Wipe away dust with a tack cloth. If the nib is removed but you’ve created a dull spot, apply a light mist coat over the area.

    For severe dust contamination, light sanding of the entire surface followed by a final mist coat often produces the best results. It’s more work than spot repairs, but it guarantees a uniform finish.

    Common Mistakes to Avoid

    Most dust problems stem from skipped preparation steps. Understand these mistakes so you don’t repeat them.

    Opening doors during spraying. Every time a door opens, dust-laden air enters.

    Sanding without dust control. Aggressive dry sanding fills the air with particles.

    Spraying in high-traffic areas. If people are walking around nearby, they stir up dust.

    Not waiting between coats. Dust settles constantly.

    Using low-quality masking materials. Cheap plastic tears easily. Use heavy-duty plastic sheeting and quality masking tape.

    Spraying without adequate ventilation. Even in a sealed space, you need some air movement to remove overspray.

    Avoiding dust during kitchen cabinet spraying comes down to one principle: control your environment completely.

    Professional finishes aren’t the result of better technique alone. They’re the result of better preparation.


    Refreshing kitchen cabinets yourself demands precision and patience. One dust particle in the wrong place can derail weeks of planning. If you’d rather leave this to professionals who’ve perfected the process, Astral Coatings Ltd. handles the entire project, from dust-free sanding through final protective coating. Contact us on WhatsApp to discuss your cabinet refinishing project and discover how professional spray finishing delivers results that last.

    Frequently Asked Questions

    How do professionals keep dust out of sprayed cabinet paint?

    Professionals prevent dust contamination through a combination of techniques: isolating the work area with plastic sheeting and tape, using tack cloths to capture fine particles before spraying, maintaining controlled air circulation to prevent dust settling, and allowing adequate drying time between preparation and application. Proper surface cleaning, sanding with appropriate methods, and maintaining clean spray equipment are equally important. These steps work together to create a dust-free environment where coatings can cure without imperfections.

    What is the best tack cloth for cabinet painting?

    A quality tack cloth should be lint-free, lightly tacky, and designed specifically for paint preparation. Look for cloths made from cotton or synthetic materials that won’t shed fibres onto your cabinets. The cloth should pick up dust and sanding debris without leaving residue. When using a tack cloth, work gently across surfaces in one direction, then allow 15-30 minutes for any remaining tackiness to evaporate before spraying. Replace the cloth once it becomes saturated with dust or loses its tackiness.

    Why do I keep getting dust nibs in my sprayed finish?

    Dust nibs form when airborne particles settle on wet coating before it dries. Common causes include inadequate surface preparation, insufficient dust barriers, poor air circulation management, or spraying in dusty conditions. Each layer of your spray finish creates a sticky surface that attracts particles. Prevent this by thoroughly cleaning and tack-clothing surfaces before each coat, sealing your work area completely, controlling humidity and temperature, and allowing proper drying time. If nibs do appear, they can be sanded out and the area resprayed once the finish fully cures.

    How long does cabinet spray coating last before peeling or chipping?

    Durability depends on surface preparation quality, coating thickness, and the product used. To extend the life of your finish, avoid excessive moisture exposure, use gentle cleaning methods, and address any damage promptly.

  • How to Spray Shopfronts: A Professional Guide

    How to Spray Shopfronts: A Professional Guide

    Table of Contents

    Last Updated: October 2, 2026

    What You’ll Need Before Spraying Shopfronts

    To spray shopfronts for commercial premises, you need specific equipment and materials. Getting these right from the start prevents delays, poor finishes, and costly mistakes. Preparation is where quality projects begin.

    Essential Equipment and Materials

    You’ll need a professional spray system to apply coatings evenly. HVLP (high-volume, low-pressure) sprayers work well for most shopfront applications. Airless sprayers deliver faster coverage for larger areas. Choose based on your surface size and the coating type you’re using.

    Essential materials include:

    • Primer suitable for your substrate (metal, uPVC, wood, or composite)
    • Top coat paint or specialist coating for commercial use
    • Thinners or reducer for your specific product
    • Dust sheets and protective coverings
    • Masking tape and plastic sheeting
    • Sandpaper in various grits (120, 180, 220)
    • Cleaning agents and degreaser
    • Spray gun tips and filters (have spares)
    • Paint trays or buckets for mixing

    Quality matters here. Cheap equipment clogs, sprays unevenly, and wastes material. Professional-grade sprayers cost more upfront but deliver consistent results and last for years.

    Safety Gear and Protective Equipment

    Spray painting generates fine mist and fumes. Proper protection keeps you safe and prevents health issues down the line.

    Required safety equipment:

    • Respiratory protection (P3-rated mask or powered respirator for solvent-based coatings)
    • Safety glasses or goggles to protect eyes from spray
    • Chemical-resistant gloves (nitrile or butyl rubber)
    • Protective coveralls or clothing you don’t mind staining
    • Steel-toed boots with slip-resistant soles
    • Ear protection if using compressors or high-noise equipment

    The respirator is non-negotiable. Breathing paint fumes causes headaches, dizziness, and long-term respiratory damage. A proper respirator costs £30-£80 and lasts through many projects.


    Preparing Your Shopfront for Spray Coating

    Preparation determines whether your finish lasts years or peels within months. Rush this phase and you’ll regret it. Take time to assess, clean, and protect properly.

    Surface Assessment and Cleaning

    Before spraying, inspect the entire surface. Look for cracks, peeling paint, rust, or damage. These need repair before coating.

    Steps for surface assessment:

    1. Walk the full shopfront in daylight. Note any problem areas.
    2. Feel the surface with your hand. Loose paint will crumble or flake.
    3. Check for rust on metal frames. Light surface rust can be sanded. Deep rust needs grinding or replacement.
    4. Identify any gaps or crevices where moisture hides.

    Cleaning removes dirt, grease, and old coating that prevent adhesion. A poor bond means your new finish fails quickly.

    Clean the surface thoroughly:

    • Degrease with a suitable chemical cleaner for your surface type
    • Wash with water and allow to dry completely
    • Sand the surface to remove gloss and create texture for adhesion
    • Wipe down with a tack cloth to remove dust
    • Allow 24 hours drying time before priming

    Moisture is your enemy. Even slight dampness under the coating causes blistering and peeling. On damp days, allow extra drying time.

    Masking and Protection

    Spray reaches areas you don’t intend to coat. Masking protects adjacent surfaces and keeps the work area clean.

    Masking strategy:

    • Cover windows completely with plastic sheeting and tape
    • Protect door frames, handles, and hinges with tape and plastic
    • Shield any signage, lights, or fixtures with dust sheets
    • Lay protective coverings on the ground to catch overspray
    • Tape all edges carefully. Gaps allow spray to creep underneath.
    • Use quality masking tape. Cheap tape lets spray seep under edges.

    This looks tedious, but it saves hours of cleanup and prevents damage claims. A single scratch on a customer’s door or window is expensive to repair.


    Step-by-Step Process for Spraying Shopfronts

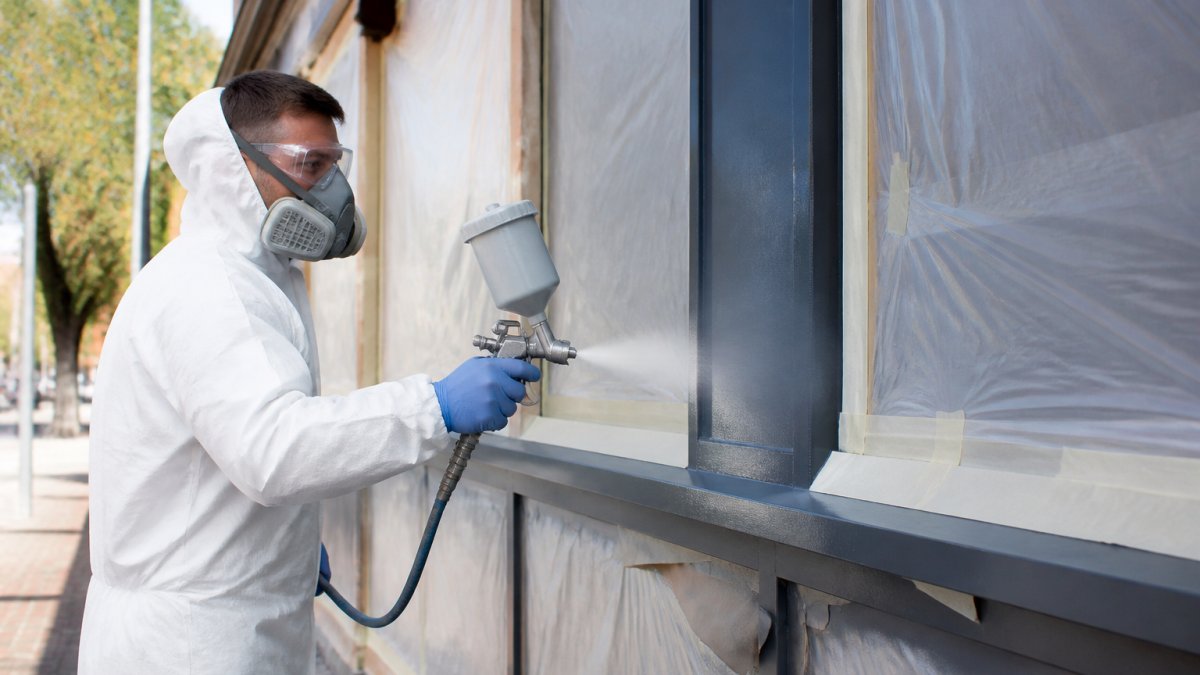
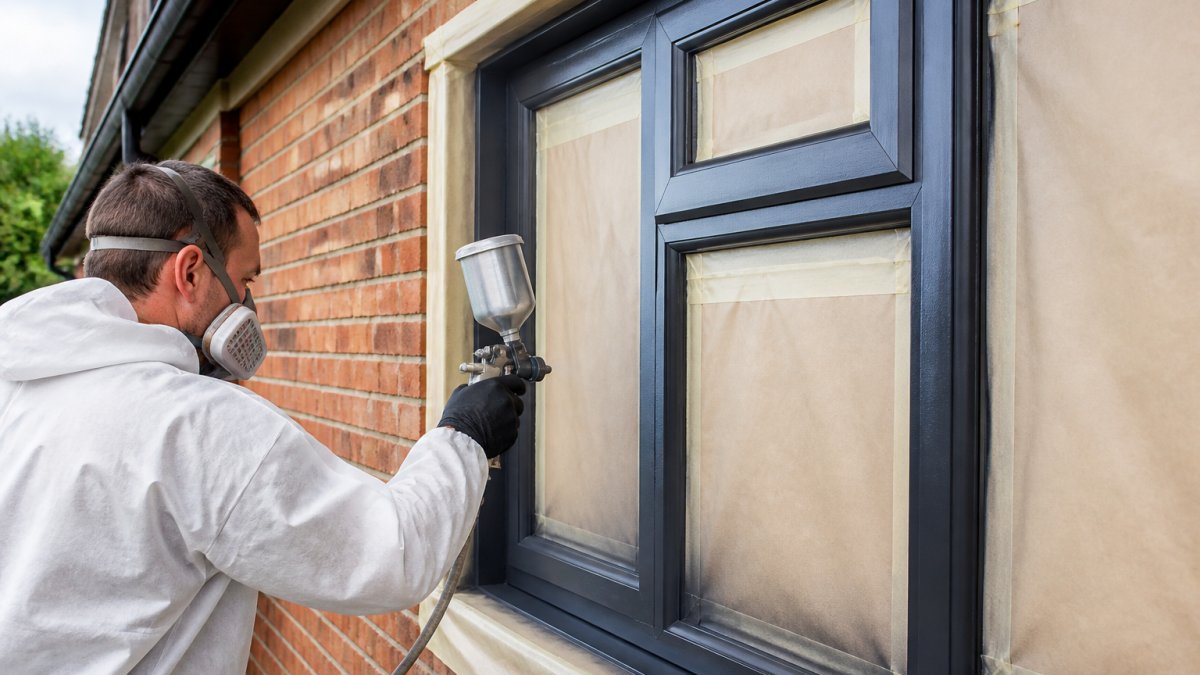
    Professional spray painter wearing full protective gear including respirator and safety glasses, applying coating to a commercial shopfront using HVLP spray equipment in bright daylight, with plastic sheeting protecting adjacent surfaces
    Professional spray painter wearing full protective gear including respirator and safety glasses, applying coating to a commercial shopfront using HVLP spray equipment in bright daylight, with plastic sheeting protecting adjacent surfaces

    The actual spraying follows a proven sequence. Each layer builds on the last. Skip steps or rush them and the finish suffers.

    Priming and Base Coat Application

    Prime first. Primer seals the surface, improves adhesion, and provides a base for topcoat. Skip primer and your topcoat won’t stick properly.

    Primer application:

    1. Thin the primer according to manufacturer instructions. Consistency matters.
    2. Test spray on a scrap surface first. Adjust spray pattern and pressure.
    3. Apply primer in thin, even coats. One heavy coat is worse than two light ones.
    4. Spray in overlapping passes, working top to bottom.
    5. Allow full drying time between coats (check product instructions, typically 2-4 hours).
    6. Sand lightly between primer coats with fine-grit paper (220) to improve adhesion.

    Most shopfronts need 2 coats of primer for proper coverage. Metal and bare wood require primer. Previously painted surfaces may need only 1 coat if the existing finish is sound.

    Applying the Topcoat

    The topcoat is what people see. It provides colour, protection, and durability.

    Contact us on WhatsApp →

    Topcoat application:

    1. Ensure primer is fully dry and sanded smooth.
    2. Thin topcoat to the correct viscosity (test on scrap first).
    3. Apply in thin, even coats with consistent overlaps.
    4. Maintain proper spray distance (typically 25-30 cm from surface).
    5. Work methodically top to bottom, side to side.
    6. Apply 2-3 coats depending on colour and coverage.
    7. Allow proper drying between coats.

    The key is patience. One thick coat runs and sags. Multiple thin coats build a smooth, professional finish. Each coat should take 15-30 minutes to apply, depending on area size.

    Temperature and humidity affect drying. Cold or damp conditions slow drying and can cause issues. Ideal conditions are 15-25°C with humidity below 80%.

    Final Inspection and Touch-Ups

    Once dry, inspect the entire surface. Look for drips, sags, thin spots, or missed areas.

    Inspection checklist:

    • Check for runs or sags (especially on vertical surfaces)
    • Look for thin spots where primer shows through
    • Identify any dust particles or debris in the finish
    • Check edges and corners for complete coverage
    • Ensure colour is uniform across the entire shopfront

    Minor imperfections can be sanded smooth and spot-coated. Sand lightly with fine paper (320 or finer) and apply a thin topcoat to the area.

    Allow full cure time before removing masking. Topcoats typically cure fully in 7-14 days depending on product type. Don’t rush this. Premature removal of tape can damage the fresh finish.


    Benefits of On-Site Spray Painting for Commercial Premises

    Spray painting offers advantages over traditional brush or roller application. For commercial shopfronts, these benefits directly affect your business.

    On-site spray painting delivers:

    • Faster application, Spray covers large areas in hours, not days
    • Smoother finish, No brush marks or roller texture visible
    • Better adhesion, Spray atomises coating for superior bonding
    • Uniform colour, No variation between hand-applied sections
    • Professional appearance, Customers notice the quality immediately
    • Minimal disruption, Work completes quickly, reducing business downtime
    • Durability, Proper spray application with optimal coating thickness lasts longer than brush work

    The finish quality is the main advantage. A professionally sprayed shopfront looks new, not refreshed. This impression matters for customer perception and brand image.


    Understanding Commercial Shopfront Refurbishment Costs

    Commercial shopfront refurbishment costs vary based on surface area, condition, and coating type. Several factors influence the final price.

    Cost drivers include:

    • Surface size, Larger shopfronts cost more to prepare and spray
    • Existing condition, Heavily damaged surfaces require more prep work
    • Substrate type, Metal, uPVC, wood, and composite require different primers
    • Coating quality, Premium coatings cost more but last longer
    • Access difficulty, Hard-to-reach areas take longer and cost more
    • Downtime requirements, Rush jobs may cost extra

    For an accurate quote, measure your shopfront dimensions and photograph the current condition. Provide details about the substrate material and any problem areas. Professional contractors assess the work scope and provide detailed pricing based on your specific situation.


    How to Choose a Commercial Spray Painting Contractor

    Selecting the right contractor determines whether your shopfront looks professional or disappointing. Poor workmanship is expensive to fix.

    What to evaluate when choosing a contractor:

    • Experience with commercial shopfronts, Ask for examples of previous work
    • Insurance and liability coverage, Verify they’re properly insured
    • Professional training, Look for certifications or academy training
    • References and reviews, Check customer feedback and testimonials
    • Detailed quotation, Get specifics about prep work, materials, and timeline
    • Warranty or guarantee, Reputable contractors stand behind their work
    • Health and safety compliance, They should follow proper safety protocols

    Common Mistakes to Avoid When Spraying Shopfronts

    Common errors include:

    Skipping surface preparation, This is the biggest mistake. Poor prep leads to peeling, poor adhesion, and short finish life. Take time to clean, sand, and repair properly.


    Frequently Asked Questions

    How long does shopfront spray painting last?

    Professional spray coatings on shopfronts typically last 5-10 years or longer, depending on weather exposure, surface preparation, and coating quality. A properly applied three-step process with primer, base coat, and topcoat provides durability that withstands rain, UV exposure, and temperature changes. Regular maintenance and cleaning extend the lifespan significantly. Factors like coastal salt spray or heavy foot traffic may require earlier recoating.

    What’s the difference between spray painting a shopfront and replacing it entirely?

    Spray painting costs considerably less than replacement whilst delivering a refreshed appearance. Replacement involves removing old frames, disposing of materials, and installing new units, which disrupts business operations for days or weeks. Spray coating takes days, not weeks, minimises downtime, and avoids the expense of new materials and installation labour. However, replacement suits severely damaged frames beyond repair. Spray coating works best on structurally sound shopfronts needing aesthetic renewal.

    What surfaces can be spray painted on commercial shopfronts?

    Spray coating works effectively on uPVC frames, aluminium, timber, and composite materials commonly found on commercial shopfronts. The process suits doors, windows, frames, and fascias. However, glass surfaces require masking to prevent coating. Heavily rusted or corroded metal may need specialist treatment before spraying. The key is proper surface preparation, cleaning, degreasing, and light sanding, to ensure the coating adheres correctly regardless of material type.

    Do I need planning permission to spray a commercial shopfront?

    Most shopfront spray coating projects do not require planning permission, as you’re refinishing existing structures rather than altering them structurally or materially changing their appearance. However, if the new colour significantly alters the building’s character or if your premises is listed or in a conservation area, check with your local planning authority first. Some conservation areas have strict guidelines on external finishes. It’s wise to confirm before starting work to avoid complications.

  • uPVC Window Restoration Services: A Complete Guide

    uPVC Window Restoration Services: A Complete Guide

    Table of Contents

    Last Updated: October 1, 2026

    What uPVC Window Restoration Involves

    uPVC window restoration is the process of refinishing weathered or discoloured plastic window frames, doors, and conservatory panels using professional spray coating techniques. Rather than replacing the entire frame, restoration breathes new life into existing structures by applying durable, factory-finish coatings that protect against the elements whilst transforming appearance.

    The restoration process addresses common problems homeowners face: faded frames that look tired, discolouration from years of exposure, and surfaces that no longer match updated interiors. At Astral Coatings Ltd., we specialise in transforming these worn fixtures into a renewed, high-quality look using meticulous application methods that ensure lasting results.

    What makes professional restoration different from a DIY paint job is precision. The coating must be applied at exactly the right thickness to provide weatherproof protection. Too thin, and durability suffers. Too thick, and the finish becomes uneven. This is where trained specialists make the difference.

    Why Windows Sprayed with Professional Coatings Matter

    Weathered uPVC frames aren’t just an aesthetic problem, they’re a durability issue. Unprotected plastic degrades under UV exposure, losing its colour and structural integrity over time. Professional coatings create a protective barrier that stops this degradation.

    A properly applied coating serves multiple purposes simultaneously. It shields against moisture penetration, resists UV fading, and provides a hard-wearing surface that withstands weather cycles. This multi-layer protection is why professionally sprayed windows are durable.

    The visual transformation matters too. A home with faded, yellowed window frames looks neglected, even if everything else is well-maintained. Refreshing these frames with a professional finish immediately improves kerb appeal and property perception. For homeowners in West Sussex considering property value, this matters significantly.

    Professional application also protects surrounding surfaces during the work. Masking, containment, and careful technique mean your kitchen worktops, appliances, and nearby furnishings remain untouched.

    Pro Tip
    The finish quality depends entirely on surface preparation. Dirty or damaged frames won’t accept coating properly, which is why professionals clean and assess surfaces thoroughly before spraying begins. This extra step is what separates lasting results from disappointing ones.

    Understanding uPVC Window Spray Painting Cost

    Cost for uPVC window restoration varies significantly based on surface area, frame condition, and project scope. A single window costs considerably less than a full conservatory, and weathered frames requiring extra preparation cost more than those in reasonable condition.

    Factors affecting pricing include the number of windows and doors being restored, whether the work is interior or exterior, and accessibility. A straightforward job, say, four bedroom windows in good condition, costs less than a complex project involving multiple conservatory panels, French doors, and weathered frames requiring intensive preparation.

    Rather than guessing at figures, homeowners should request a site visit and quotation. This allows specialists to assess actual conditions and provide accurate pricing based on what’s needed. Contact Astral Coatings Ltd. for a consultation to understand costs for your specific situation.

    One common misconception is that professional restoration costs nearly as much as replacement. For homeowners seeking value, restoration delivers significant savings whilst achieving a professional finish.

    Watch Out
    Beware of unusually low quotes. Bargain pricing often reflects corners being cut, inadequate surface preparation, thin coatings, or rushed application. These shortcuts lead to premature peeling or chipping, ultimately costing more when repairs become necessary.

    How Long Does uPVC Spray Painting Last

    Professionally applied coatings on uPVC typically maintain their appearance and protective qualities for many years. The lifespan depends on climate exposure, maintenance, and application quality. Frames in sheltered locations last longer than those facing constant weather exposure.

    Exterior frames experience more stress than interior ones, so durability expectations differ. A kitchen with protected interior uPVC doors can see a finish remain vibrant for extended periods, whilst a conservatory roof panel facing direct sun and rain requires more frequent maintenance.

    What most guides miss is that durability isn’t just about the coating, it’s about the preparation underneath. A professionally prepared surface with optimal coating thickness lasts significantly longer than a hastily applied finish. This is why Astral Coatings Ltd. emphasises meticulous preparation as part of our three-step process.

    Maintenance also affects longevity. Regular cleaning with appropriate products keeps the finish looking fresh and extends its protective life. Harsh chemicals or abrasive scrubbing can damage coatings prematurely, so gentle care matters.

    Restoration vs Replacement: Making the Right Choice

    The decision between restoration and replacement depends on frame condition, budget, and long-term goals. Restoration works best when frames are structurally sound but visually tired. If uPVC is cracked, severely warped, or failing to seal properly, replacement becomes necessary.

    Restoration suits homeowners who want immediate visual improvement without major disruption. The process takes days, not weeks. There’s minimal mess, no debris removal, and no need to relocate furniture or appliances. For someone working from home or managing a busy household, this advantage is substantial.

    Replacement suits situations where frames are genuinely failing, seals broken, glass units failing, structural damage present. In these cases, restoration won’t solve underlying problems. However, if your frames are simply discoloured or tired-looking, restoration delivers the transformation you want at a fraction of replacement cost.

    The common mistake is assuming old frames must be replaced. Many frames that appear worn are perfectly functional and structurally sound. They just need a professional refresh. This is where a specialist assessment proves invaluable.

    Contact us on WhatsApp →

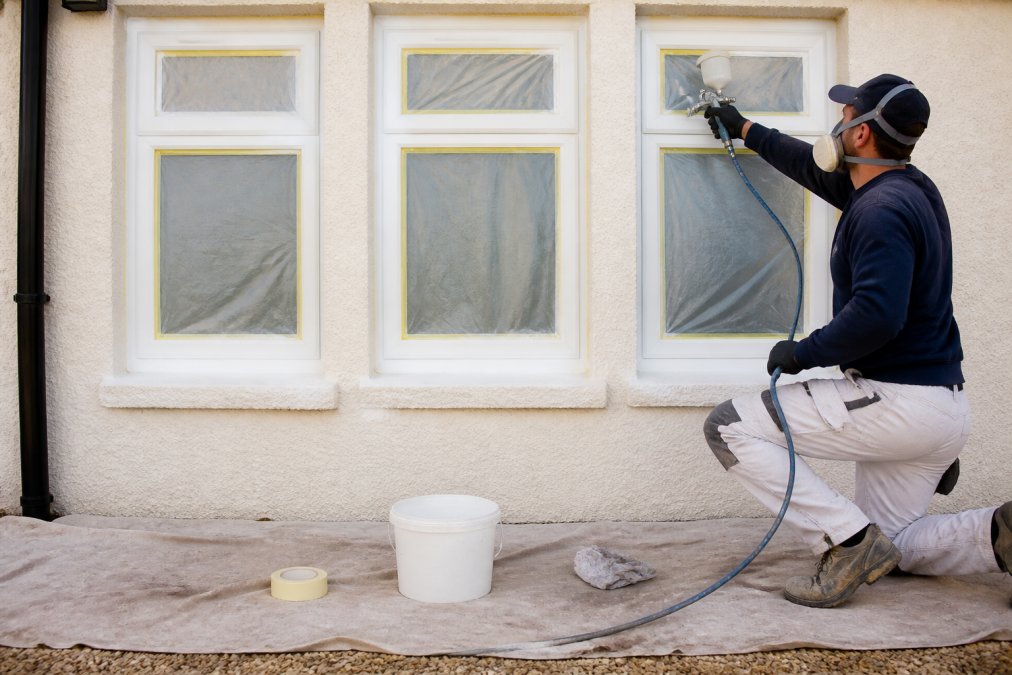
    Professional spray painter carefully applying protective coating to uPVC window frame using professional equipment with masking tape and drop cloths securing surrounding surfaces
    Professional spray painter carefully applying protective coating to uPVC window frame using professional equipment with masking tape and drop cloths securing surrounding surfaces

    The Three-Step Spraying Process Explained

    Professional uPVC window restoration follows a structured approach that ensures durability and finish quality. The three-step process separates professional results from amateur attempts.

    Step one: preparation and cleaning. Frames are thoroughly cleaned to remove dirt, algae, and contaminants that prevent proper coating adhesion. This isn’t a quick wipe-down, it’s a detailed cleaning that addresses every surface. Damaged areas are assessed, and any necessary repairs are completed before coating begins. Surrounding surfaces are masked to protect against overspray.

    Step two: primer application. A specialist primer is applied to create a foundation for the top coat. This primer ensures the coating bonds properly to the uPVC surface and provides additional protection. The primer layer is essential, skipping this step is why DIY attempts often fail.

    Step three: final coating application. The topcoat is applied using professional spray equipment, ensuring even coverage and optimal thickness. This is where the visible transformation happens. The finish must be uniform, free of runs or drips, and perfectly smooth. Multiple light passes deliver better results than one heavy application.

    What separates Astral Coatings Ltd.’s approach is attention to detail at each stage. We’ve trained at the Dulux Academy and Llewellyns of Brighton, which means we understand coating chemistry and application techniques at a professional level. This training translates to finishes that look factory-fresh and last.

    The entire process typically takes several days depending on project size. Drying time between coats is essential, rushing this stage compromises the final result.

    Key Takeaway
    The three-step process isn’t just about applying paint. It’s a system designed to ensure the coating bonds properly, cures completely, and delivers lasting protection. Each step matters equally, skip any one, and durability suffers.

    What to Expect During Your Restoration Project

    A professional restoration project follows a predictable timeline that minimises household disruption. Understanding what happens at each stage helps you prepare and manage expectations.

    Initial consultation and assessment. A specialist visits your property to evaluate frame condition, discuss colour options, and provide a quotation. This is when questions get answered and concerns addressed.

    Preparation phase. Before spraying begins, extensive masking protects your kitchen, appliances, worktops, and furnishings. Windows and doors are cleaned thoroughly, any repairs are completed, and the work area is secured. This phase typically takes a full day for larger projects.

    Spraying phase. The actual coating application happens over several days, with drying time between coats. You’ll notice the transformation as each coat is applied. Noise and dust are minimal with professional equipment and techniques.

    Curing and inspection. After the final coat, frames cure fully before masking is removed. A final inspection ensures the finish meets professional standards.

    Disruption is genuinely minimal compared to renovation work. You can continue using your home normally, though you’ll need to avoid touching freshly coated surfaces. Most homeowners find the process straightforward and the results worth any minor inconvenience.

    According to the Health and Safety Executive’s guidance on spray application, professional spray work requires proper ventilation and containment to protect both workers and occupants. Astral Coatings Ltd. follows these standards rigorously, ensuring safe working practices throughout every project.

    The real difference between professional restoration and DIY attempts becomes obvious once the work is complete. A professionally restored window looks factory-fresh, feels durable to the touch, and maintains that appearance. This is what trained expertise and proper technique deliver.


    Refreshing tired uPVC windows without the cost and disruption of replacement is genuinely possible, but only when the work is done properly.

    Restoration Stage What Happens Duration
    Consultation Frame assessment, colour selection, quotation 1 hour
    Preparation Cleaning, masking, surface repairs 1 day
    Primer coat First protective layer application 1 day + drying
    Final coating Top coat application for finish 1-2 days + curing
    Inspection Quality check and masking removal Half day

    Frequently Asked Questions

    Is it worth restoring old uPVC windows instead of replacing them?

    Restoration offers significant savings compared to full replacement whilst delivering a factory-fresh finish. If your frames are structurally sound but weathered or discoloured, professional spray coating restores them effectively. Replacement becomes necessary only when frames have severe damage, failed seals, or broken mechanisms. For most homeowners, restoration provides excellent value and extends window life considerably.

    How long does professional uPVC spray painting last on windows?

    High-quality professional spray coatings typically last many years, depending on exposure to weather and maintenance. The durability depends on proper surface preparation, coating thickness, and the quality of materials used. A meticulous three-step process ensures optimal coating thickness for maximum longevity. Regular cleaning helps extend the finish and maintains its appearance throughout its lifespan.

    What is the typical cost difference between restoring and replacing uPVC windows?

    Restoration costs significantly less than replacement. Exact pricing depends on window quantity, surface area, condition, and your location. For accurate costs tailored to your project, contact a professional service provider for a detailed quote. Most homeowners find restoration delivers exceptional value for refreshing their property’s appearance.

    Can professional restoration work on severely weathered or discoloured frames?

    Yes, professional restoration effectively addresses weathering, discolouration, and fading. The process includes thorough preparation to remove oxidation and surface damage before applying new coatings. Even significantly aged frames can be restored to a renewed, high-quality appearance. However, if frames have structural damage, broken seals, or mechanical failures, replacement may be more appropriate.

  • Shopfront Branding Regulations: A 2026 Guide

    Shopfront Branding Regulations: A 2026 Guide

    Table of Contents

    Last Updated: September 30, 2026

    Why Shopfront Branding Regulations Matter

    Shopfront branding regulations exist to protect your community’s character, safety, and heritage. They balance your right to advertise with the public’s right to live in well-maintained neighbourhoods. Breaking these rules can lead to costly enforcement action, fines, or forced removal of signage. Understanding what you need before you install anything saves time, money, and frustration.

    Most business owners discover these rules after they’ve already ordered their signs. At Astral Coatings Ltd., we work with local property owners and shopkeepers across the region. Whether you’re refreshing a tired shopfront with professional spray finishing or installing new signage, you need to know what your local council requires.

    The regulations differ depending on your location, the type of sign, and whether your property sits in a conservation area or is listed. This guide walks you through each requirement so you can plan with confidence.

    Planning Permission for Shop Signs

    Planning permission for shop signs depends on the sign’s size, illumination, and location. Many signs don’t need permission at all. Others require formal consent before installation.

    Signs under 0.5 square metres that don’t obscure windows typically fall under “permitted development”, you can install them without applying. But once you exceed that size, or if your sign projects from the building or uses flashing lights, you’ll need to apply to your local council for planning permission.

    The application process usually takes 8-13 weeks. You’ll submit drawings, photographs of the site, and details of materials and colours. Your council will assess whether the sign harms the area’s appearance or traffic safety. Approval isn’t guaranteed, especially in historic areas.

    A common mistake is assuming all illuminated signs need permission. Some do, some don’t. Steady, non-animated lights are often permitted development. Flashing, chasing, or changing lights almost always require consent. Check with your local planning authority before you commit to a design.

    Key points to verify with your council:

    • Sign dimensions and projected area
    • Whether it’s internally or externally illuminated
    • Distance from the road and visibility from vehicles
    • Whether your property is in a conservation area

    Advertisement consent is separate from planning permission. Even if your sign doesn’t need planning permission, it may need advertisement consent from your local council.

    The Town and Country Planning (Control of Advertisements) Regulations 2007 govern this (The Town and Country Planning (Control of Advertisements) (England) Regulations 2007). Most shop signs fall within exemptions, meaning you don’t need to apply. But certain types, directional signs, illuminated fascias, or signs that obscure architectural features, require formal consent.

    Your council’s planning department can tell you in minutes whether your specific sign needs consent. It’s worth asking before you design anything. The application is straightforward, but rejections can delay your project by weeks.

    Signs that breach advertisement regulations can be removed at your expense. Councils have enforcement powers and will act if complaints arise. Prevention is far cheaper than removal.

    Signs that typically need advertisement consent:

    • Illuminated fascia signs covering more than 50% of the shopfront
    • Projecting signs extending more than 1 metre from the building
    • Signs on listed buildings or in conservation areas
    • Directional signs pointing to off-site locations

    If your building is listed, any external alteration, including signage, painting, or spray finishing, requires listed building consent. This is a separate process from planning permission and advertisement consent.

    Listed building consent protects historic structures. Councils assess whether changes preserve or harm the building’s character and heritage value. Alterations that would be approved for ordinary buildings are often refused for listed properties.

    The consent process typically takes 8-13 weeks. You’ll need detailed drawings, photographs, and material samples. Councils often require sympathetic colours, traditional materials, or designs that match the building’s age and style.

    A critical mistake is starting work before consent is granted. Unauthorised works to listed buildings can result in enforcement action, fines, and orders to reinstate the original (gov.uk). The costs of remediation far exceed the cost of getting consent upfront.

    If your shopfront needs refreshing, whether through professional spray coating or new signage, and your building is listed, consult your local conservation officer before proceeding. They can advise on acceptable approaches that meet both heritage and commercial needs.

    Checklist for listed building consent:

    • Contact your local planning authority’s conservation team
    • Provide detailed photographs and drawings
    • Specify materials, colours, and finishes
    • Allow 8-13 weeks for determination
    • Don’t start work until consent is issued

    Colour, Design, and Conservation Area Rules

    Conservation areas have stricter rules than ordinary neighbourhoods. Councils protect these areas’ character by controlling colours, materials, and design of shopfronts and signage.

    Bright, garish colours are often refused in conservation areas. Councils prefer muted, traditional palettes that complement period architecture. If your building dates from the Victorian era, a heritage-appropriate colour scheme strengthens your consent application. Modern, high-contrast designs may clash with the area’s character.

    Professional shopfront with coordinated heritage-appropriate colour scheme in traditional conservation area, featuring muted tones and period-sympathetic signage against historic stone building facade
    Professional shopfront with coordinated heritage-appropriate colour scheme in traditional conservation area, featuring muted tones and period-sympathetic signage against historic stone building facade

    Maintaining the integrity of these heritage-sensitive palettes requires careful material selection, as preventing signage fading remains essential for preserving the long-term visual harmony of a protected streetscape.

    Design standards vary by location. Some councils publish shopfront design guides specifying acceptable styles. Others assess applications case-by-case. Before choosing colours or materials, request your council’s design guidance, many publish free documents online.

    The materials you use matter too. Plastic fascias are often refused in conservation areas; councils prefer timber or metal. If you’re refreshing a tired shopfront through professional spray finishing, using heritage-appropriate colours and finishes from the start ensures your application succeeds.

    Contact us on WhatsApp →

    Conservation area considerations:

    • Request your council’s shopfront design guide
    • Choose colours from heritage palettes
    • Use traditional materials where possible
    • Avoid plastic or overly modern finishes
    • Ensure signage complements, not dominates, the facade

    Step-by-Step Compliance Checklist

    Following these steps in order ensures you meet all regulations before installation.

    Step 1: Identify your building’s status. Check whether your property is listed or in a conservation area. Your local council’s planning portal shows this instantly. If listed, you’ll need listed building consent for any external change. If in a conservation area, stricter design rules apply.

    Step 2: Contact your local planning authority. Phone or email the planning department with details of your proposed sign or shopfront work. Describe size, materials, colours, and illumination. Ask whether planning permission, advertisement consent, or listed building consent is needed. Most councils answer this within days.

    Step 3: Check your council’s design guidance. Many publish free shopfront design guides. These show acceptable colours, materials, and styles for your area. Using guidance from the start speeds up approval.

    Step 4: Prepare your application. If consent is needed, gather photographs of your shopfront, detailed drawings of the proposed sign or finish, and material samples. Colour swatches are essential, show exactly what you plan to install.

    Step 5: Submit your application. Use your council’s online planning portal or submit by post. Include all required documents. Pay the application fee if one applies. Keep proof of submission.

    Step 6: Wait for determination. Most applications take 8-13 weeks. Your council will consult neighbours and assess whether your proposal harms the area. Check your application’s status online regularly.

    Step 7: Respond to requests for information. Councils sometimes ask for clarification or additional details. Respond promptly, delays extend the determination period.

    Step 8: Receive your decision. Approval, refusal, or conditional approval will be issued in writing. If approved, keep the decision letter. If refused, you can appeal or revise your proposal.

    Step 9: Install your sign or finish. Only after you have written consent should you proceed. Ensure the installed work matches your approved plans exactly.

    Step 10: Keep records. File your consent letter and approved drawings. These prove compliance if questions arise later.

    Common Mistakes to Avoid

    Installing signage or refreshing a shopfront without checking regulations first is the most costly error. Many business owners assume small signs need no consent, then face enforcement action.

    Choosing colours without consulting your council’s design guidance wastes time. You design something you love, submit it, and it’s refused because it clashes with the conservation area’s character. Starting again delays your project by weeks.

    Underestimating the application timeline causes problems too. Thinking you can install a sign in two weeks, then discovering the consent process takes 13 weeks, forces you to delay opening or rebranding.

    Ignoring listed building status is serious. Working on a listed building without consent can trigger enforcement action and forced reinstatement at your expense.

    Common pitfalls to sidestep:

    • Don’t assume small signs need no consent
    • Don’t choose colours before checking design guidance
    • Don’t start work before written consent arrives
    • Don’t ignore listed building or conservation area status
    • Don’t use modern materials in heritage areas without checking first

    Frequently Asked Questions

    Do I need planning permission for a new shop sign?

    Most small shop signs do not require planning permission under permitted development rules, provided they comply with size and installation standards. However, if your sign is unusually large, illuminated in certain ways, or your property is listed or in a conservation area, you will need consent. Check with your local planning authority before installation to confirm whether your specific shopfront branding requires planning permission.

    What are the rules for illuminated shopfront signage?

    Illuminated signs are subject to stricter regulations, particularly in conservation areas and on listed buildings. Most councils require advertisement consent for any illuminated signage. Internally lit box signs, neon, or LED displays typically need formal approval. Flashing or moving lights face additional restrictions. Contact your local authority’s planning department to confirm which lighting types are permitted for your shopfront branding.

    How do I apply for advertisement consent?

    Submit an application to your local planning authority with photographs of the proposed sign, technical drawings showing dimensions and materials, and details of installation. Include a site plan showing the shopfront’s location. Most councils charge a fee and respond within a set timeframe. Your local authority’s planning portal will have the specific application form and submission requirements for your area.

    What happens if I install a shop sign without permission?

    Installing signage without required consent is a breach of planning control. Your local authority can issue an enforcement notice requiring removal or alteration within a set timeframe. Non-compliance can result in prosecution and fines up to £20,000. Additionally, your business may face reputational damage and operational disruption. Always obtain the necessary consents before installation to avoid these risks.


    Shopfront branding regulations protect your neighbourhood’s character whilst allowing legitimate business signage. Getting consent upfront prevents costly enforcement action, delays, and forced removal. At Astral Coatings Ltd., we help property owners and business operators navigate these rules when refreshing shopfronts through professional spray finishing. Contact us on WhatsApp to discuss how we can refresh your shopfront’s appearance whilst ensuring full compliance with local regulations.

  • How Long Do Kitchen Spray Finishes Last

    How Long Do Kitchen Spray Finishes Last

    Table of Contents

    Last Updated: September 29, 2026

    How Long Kitchen Spray Finishes Last

    Kitchen spray finishes typically last between 7 and 10 years with proper care and maintenance, though this timeline varies significantly based on application quality and environmental factors. A professionally applied kitchen spray finish can maintain its appearance and durability well beyond a decade if the underlying preparation work meets industry standards and the kitchen environment remains reasonably controlled.

    The longevity of kitchen spray finishes depends far more on how they’re applied than on the paint itself. Homeowners often underestimate the impact of surface preparation; a rushed sanding job or inadequate primer application can cut the finish lifespan in half, regardless of the coating quality. The difference between a finish that lasts five years and one that lasts twelve often comes down to decisions made before the spray gun is even picked up.

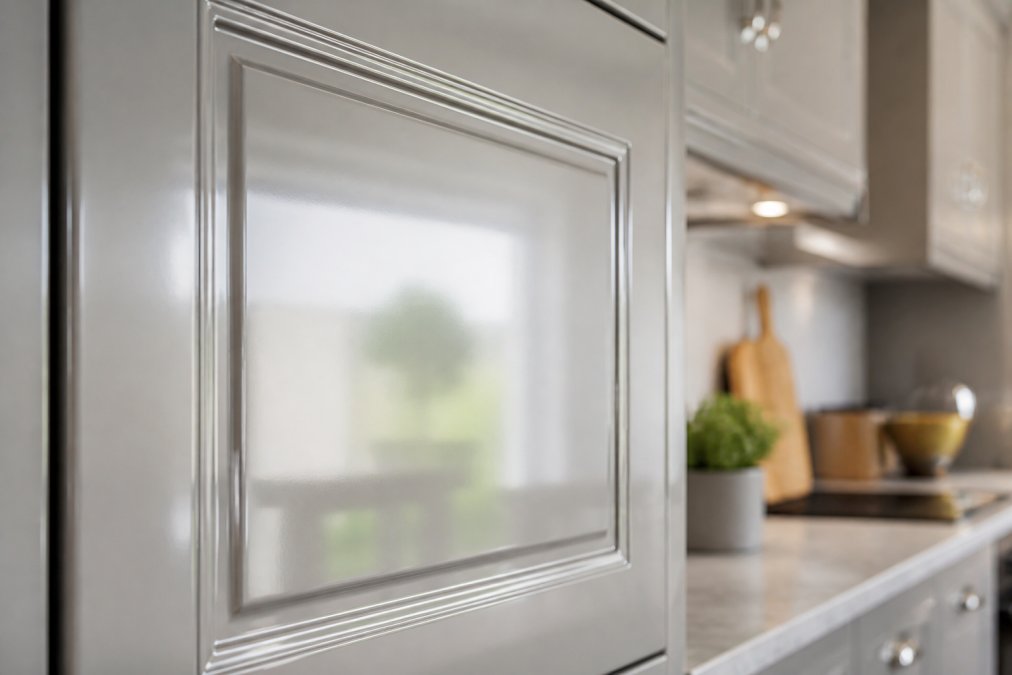
    Close-up of a freshly sprayed kitchen cabinet door showing smooth, professional glossy finish with even colour distribution and light reflecting uniformly across the surface
    Close-up of a freshly sprayed kitchen cabinet door showing smooth, professional glossy finish with even colour distribution and light reflecting uniformly across the surface

    Most kitchen spray finishes fail not because the paint degrades, but because moisture penetrates the coating or adhesion breaks down under daily wear. Understanding what actually determines durability helps homeowners make informed decisions about whether professional spraying makes financial sense for their situation.

    Pro Tip
    The three-step spraying process used by professional applicators, primer, base coat, and topcoat, isn’t just about aesthetics. Each layer serves a specific durability function. The primer bonds to the substrate, the base coat provides colour and coverage, and the topcoat protects against moisture and UV damage. Skipping any step or applying them too thin directly reduces lifespan.

    Factors That Affect Kitchen Spray Finish Durability

    Several interconnected variables determine how long your kitchen spray finish will remain intact and visually appealing. These aren’t minor considerations, each one can add or subtract years from the finish’s effective lifespan.

    Surface Preparation Quality

    The condition of the surface before spraying is the single most critical factor in finish longevity. Cabinets with old varnish, grease buildup, or uneven surfaces create adhesion problems that emerge within months, not years. Proper preparation involves thorough cleaning, sanding to bare wood or a sound substrate, and filling any gaps or damage.

    When preparation is rushed, the new finish sits on top of a compromised surface. Moisture finds its way underneath. Paint begins to peel or blister. What should have been a decade-long finish becomes a three-year problem. Professional applicators spend as much time preparing as they do spraying, sometimes more, because they know this determines everything.

    Dust contamination during application also matters more than many people realise. A single particle embedded in the wet spray can become a point where moisture enters and adhesion fails. Professional spray environments use containment measures specifically to prevent this. Home DIY attempts rarely account for dust settling mid-application, which explains why many amateur spray jobs deteriorate faster.

    Coating Thickness and Application Method

    Spray application allows for precise, even coating thickness, typically 75-125 microns per coat depending on the product. Brush or roller application cannot achieve this consistency, which is why spray-finished cabinets generally outlast hand-painted ones. The uniform thickness means no thin spots where the coating is vulnerable.

    Application method also affects how well the coating bonds to the substrate. Spray creates a better mechanical bond through atomisation, whereas brushing can leave drag marks and uneven adhesion. This structural difference translates directly into durability, spray finishes resist moisture penetration more effectively because there are no brush stroke valleys where water can collect.

    Multiple thin coats outperform a single thick coat. A professional three-coat system distributes the total film thickness across layers that cure properly, whereas one thick coat may not cure evenly throughout its depth. This layering approach is why professional kitchen spray finishes last longer than single-coat alternatives.

    Kitchen Environment and Moisture Exposure

    Kitchens present unique durability challenges because they combine heat, humidity, and moisture in ways few other rooms do. Steam from cooking, splashes from washing up, and ambient humidity all attack paint finishes. Cabinets directly above the hob or sink face accelerated degradation compared to those in drier zones.

    Ventilation quality dramatically affects finish lifespan. A kitchen with effective extraction that removes steam quickly protects the finish far better than one where humidity lingers. Poor ventilation can reduce finish durability by 40-50% simply because moisture has more time to penetrate the coating and reach the substrate.

    Temperature fluctuations also matter. Cabinets that experience significant seasonal temperature swings or daily heating cycles expand and contract, creating stress on the coating. This movement eventually causes cracking and peeling. Kitchens with stable temperatures maintain finishes better than those with dramatic variations.

    Benefits of Professional Kitchen Cabinet Spraying

    Professional spraying offers durability advantages that extend beyond the initial aesthetic appeal. The investment typically pays for itself through the extended lifespan of the finish and the superior appearance it maintains over time.

    The primary benefit is consistency. Professional equipment delivers uniform coating thickness across every cabinet, every door, and every surface. This uniformity means no weak spots, no thin areas that fail early, and no variation in colour or sheen. Homeowners attempting spray finishing rarely achieve this level of consistency without significant experience.

    Astral Coatings Ltd. employs a meticulous three-step spraying process that addresses both immediate appearance and long-term durability. This methodical approach takes longer than a quick spray job, but the finish lasts significantly longer as a result.

    Contact us on WhatsApp →

    Professional applicators also protect your kitchen during the process. Proper masking prevents overspray on worktops, appliances, and flooring. This attention to detail means you don’t face the choice between accepting spray damage or paying for repairs. The surrounding environment remains protected throughout the work.

    Key Takeaway
    The real cost comparison isn’t between professional spraying and DIY. When you factor in the cost of respraying cabinets that failed prematurely, professional application often proves more economical over a longer period.

    Maintenance Tips to Extend Your Spray Finish Lifespan

    How you care for spray-finished cabinets after application determines whether they reach their full potential lifespan. Proper maintenance can extend a finish by several years, while neglect can cut it short.

    Clean cabinets regularly with a soft, damp cloth and mild detergent. Avoid abrasive scrubbers or harsh chemicals that can damage the topcoat. Grease and food residue should be removed promptly because they can degrade the finish over time. This doesn’t require special products, warm soapy water works effectively.

    Wipe up spills immediately, particularly around the hob and sink where moisture exposure is highest. Water sitting on the finish seeps into micro-cracks and compromises adhesion. Quick drying prevents this damage. Similarly, ensure good ventilation during and after cooking to reduce humidity exposure.

    Avoid placing hot items directly on cabinet surfaces. Extreme heat can soften or damage the topcoat. Use trivets or protective mats for pans and hot cookware. This simple precaution prevents localised damage that can become entry points for moisture.

    Inspect cabinets periodically for signs of wear. Small chips or cracks should be touched up promptly before moisture penetrates deeper. Most professional applicators can provide matching paint for minor repairs. Addressing damage early prevents it from spreading.

    How to Clean Spray Painted Kitchen Cabinets

    Cleaning spray-painted cabinets differs slightly from cleaning other surfaces because the finish is more delicate than solid wood and requires gentler care. Understanding proper cleaning technique protects your investment.

    Use a microfibre cloth or soft cotton cloth rather than paper towels, which can be abrasive. Dampen the cloth with warm water and add a drop of mild washing-up liquid. Wring out excess water so the cloth is damp, not wet. Excess water sitting on the finish can cause damage.

    Wipe cabinets in the direction of the grain (if applicable) or in gentle circular motions. This approach removes dust and light grime without creating visible swirl marks. For stubborn marks or grease buildup, slightly increase the concentration of washing-up liquid, but avoid strong degreasers or bleach-based cleaners that can strip the topcoat.

    Dry cabinets immediately after cleaning with a separate dry cloth.

    Watch Out
    Never use scouring pads, wire brushes, or abrasive cleaners on spray-finished cabinets. These tools can scratch or dull the topcoat, creating visible damage and potential entry points for moisture. Even “gentle” abrasive pads can harm the finish.

    Understanding Kitchen Cabinet Spraying Cost and Value

    The cost of professional kitchen cabinet spraying varies based on the number of cabinets, complexity of the layout, and current condition of the surfaces. Rather than stating specific prices, which depend on individual project scope, the value proposition becomes clear when you compare the total cost of ownership over time.

    Signs Your Kitchen Spray Finish Needs Refreshing

    Even well-maintained spray finishes eventually show signs of wear. Recognising these indicators helps you plan for refresh work before the finish deteriorates significantly.


    Frequently Asked Questions

    How many years does a professional kitchen spray finish typically last?

    Professional kitchen spray finishes generally last 7-10 years with proper maintenance. The lifespan depends on how well the surface was prepared before spraying, the quality of the coating applied, and how much moisture and wear your kitchen experiences. Homes with good ventilation and regular cleaning see finishes last towards the upper end of this range. Professional application ensures optimal coating thickness, which significantly extends durability compared to DIY attempts.

    What factors have the biggest impact on how long kitchen spray finishes last?

    Surface preparation is critical, any dust, grease, or uneven substrate leads to premature peeling. Kitchen moisture and steam exposure also matter greatly; poor ventilation accelerates deterioration. The spraying method itself affects durability; a meticulous multi-step process applies even coating thickness, whereas single-pass spraying often results in thin, vulnerable finishes. Finally, your maintenance routine, regular gentle cleaning and avoiding abrasive scrubbing, directly influences how long the finish remains intact and attractive.

    Does professional spray painting last longer than hand painting kitchen cabinets?

    Yes, professional spray application produces more durable finishes. Spray methods deliver consistent, even coating thickness across all surfaces, including hard-to-reach areas inside cabinet frames. Hand painting often leaves visible brushstrokes, uneven coverage, and thinner layers that chip more easily. Professional sprayers also use industrial-grade equipment and follow rigorous preparation protocols that hand painters typically skip, resulting in better adhesion and longer-lasting colour and protection.

    How can I tell if my kitchen cabinets need respraying?

    Watch for peeling, flaking, or chipping paint, especially around handles and high-touch areas. Dull or discoloured patches suggest the finish is wearing through. If cabinets feel sticky or tacky to the touch, the topcoat is breaking down. Visible brush marks or uneven sheen also indicate the finish is failing. If your spray finish is approaching 7-10 years old and showing any of these signs, respraying will restore both appearance and protection. A professional inspection can confirm whether refinishing is needed.

  • Residential Spray Finishing Services: A Guide

    Residential Spray Finishing Services: A Guide

    Table of Contents

    Last Updated: September 28, 2026

    What Residential Spray Finishing Offers

    Residential spray finishing services apply professional-grade coatings to interior and exterior surfaces using precision spray equipment, delivering a smooth, durable finish without the cost of full replacement or renovation. This approach transforms worn kitchens, faded uPVC windows, doors, and conservatories into refreshed spaces that look factory-fresh. Astral Coatings Ltd. helps homeowners achieve high-quality results by spraying existing fixtures instead of replacing them entirely.

    The core appeal lies in the durability and aesthetic quality. Spray-applied coatings bond uniformly across surfaces, creating a finish that hand painting simply cannot match. Unlike brush or roller application, spray finishing eliminates brush marks, drips, and uneven coverage. The process also allows for optimal coating thickness, which directly impacts how long the finish will withstand daily wear, weathering, and UV exposure.

    What makes residential spray finishing particularly valuable is the speed and minimal disruption. A kitchen cabinet refresh that might take weeks with traditional painting can be completed in days with spray finishing. The finish dries faster, cures quicker, and homeowners can return to normal use sooner. For busy households or those working from home, this matters significantly.

    Pro Tip
    The durability difference is measurable. Properly sprayed finishes on kitchen cabinets can outlast hand-painted ones because the coating thickness is consistent and the adhesion is superior. This is why professional spray finishing delivers results that justify the investment.

    Kitchen Cabinet Spray Finishing Benefits

    Kitchen cabinets are the most visible target for spray finishing, and the benefits here are substantial. A sprayed cabinet finish provides a factory-quality appearance that transforms the entire kitchen aesthetic without the disruption, cost, or waste of a full cabinet replacement. Homeowners often hesitate between refreshing existing cabinets or buying new ones, and spray finishing makes the former genuinely competitive.

    The finish quality is the primary advantage. Spray application creates a smooth, glass-like surface free of brush marks or texture variation. This uniformity catches light evenly, making the kitchen feel more polished and contemporary. The visual difference between a hand-painted cabinet and a professionally sprayed one can be significant, with the sprayed finish often looking more refined.

    Durability in the kitchen environment is critical. Cabinets face heat from cooking, moisture from washing up, and constant handling. A properly applied spray finish resists chipping, peeling, and wear better than hand-applied coatings. The kitchen cabinet spray finishing benefits extend to colour stability as well; professional coatings can resist yellowing and fading.

    Cost efficiency is another genuine benefit. Replacing a full kitchen can be a significant investment. Spray finishing the existing cabinets costs a fraction of that while delivering a genuinely renewed look. For homeowners wanting to refresh their space without a major renovation budget, this is often a decisive factor.

    uPVC Window Spray Painting Cost and Value

    uPVC windows, doors, and conservatories are excellent candidates for spray finishing, particularly when they’ve faded, yellowed, or developed that tired, weathered appearance that characterises older installations. The uPVC window spray painting cost comparison is straightforward: replacement can be a significant investment per window or door, whilst spray finishing costs substantially less whilst delivering a restored appearance.

    The value proposition centres on restoring factory-fresh aesthetics without replacement. uPVC can chalk, discolour, and lose its crisp appearance over time depending on sun exposure and maintenance. Replacement means removing frames, disposing of old units, and disrupting the property. Spray finishing simply applies a protective, colour-matched coating that restores the original look.

    Weather resistance is a key consideration. Professional spray coatings protect uPVC from further UV degradation and weathering. This protective layer extends the functional life of the frames themselves, not just their appearance. A sprayed uPVC window will resist fading and chalking better than an uncoated, aged frame.

    The process works on frames that are structurally sound but visually worn. If the seals are failing, the glass is damaged, or the frames are warped, replacement is necessary. But if the issue is purely cosmetic, fading, discolouration, or a dated appearance, spray finishing restores the property without the expense and disruption of replacement. This distinction matters because many homeowners assume their windows need replacing when they simply need refinishing.

    Watch Out
    Weathered frames with surface cracks or significant damage may not be suitable for spray finishing alone. The coating will not repair structural issues, it restores appearance on sound frames. Have the frames assessed before committing to the work.

    Professional Spray Painting vs Hand Painting

    The differences between professional spray finishing and hand painting are substantial enough to justify choosing one over the other based on the specific project. Both methods apply paint, but the results, durability, and finish quality diverge significantly.

    Hand painting offers control and precision on small, detailed areas. Trim work, edges, and intricate mouldings are often easier to hand paint without overspray. Hand painting also works well on surfaces that are difficult to mask or protect. However, hand painting is inherently slower, more labour-intensive, and prone to visible brush marks, uneven coverage, and variations in finish thickness.

    Professional spray painting delivers uniform coverage, superior finish quality, and faster application. Spray equipment atomises the coating into fine particles, creating a smooth, even layer without brush marks or texture. The coating thickness is consistent across the entire surface, which directly translates to better durability and longevity. Spray finishing is also faster, large surfaces like kitchen cabinets or conservatory frames are completed in a fraction of the time hand painting would require.

    The durability difference can be measurable. Hand-painted finishes may show wear within a few years in high-use areas like kitchens. Professionally sprayed finishes, when properly applied, can last longer. The superior adhesion and uniform thickness of spray application account for this difference.

    Contact us on WhatsApp →

    Cost-wise, spray finishing can have higher upfront material and equipment costs, but the speed of application often makes the total labour cost competitive with hand painting, particularly on larger projects. For kitchen cabinets, conservatories, or multiple uPVC frames, spray finishing can deliver better value over the lifetime of the finish.

    Key Takeaway
    Choose spray finishing for large, visible surfaces where finish quality and durability matter. Choose hand painting for small detailed areas, tight spaces, or projects where overspray risk is high. Most residential projects benefit from a combination, spray for the main surfaces, hand finishing for edges and details.

    The Three-Step Spray Finishing Process

    Professional spray finishing follows a disciplined three-step process that distinguishes high-quality work from rushed or amateur efforts. Understanding these steps explains why professional spray finishing costs more than basic painting and why the results justify the investment.

    Professional spray painter wearing protective respirator and safety gear applying coating to kitchen cabinet door using precision spray equipment, with blue masking tape and protective sheeting visible on surrounding surfaces
    Professional spray painter wearing protective respirator and safety gear applying coating to kitchen cabinet door using precision spray equipment, with blue masking tape and protective sheeting visible on surrounding surfaces

    Step One: Surface Preparation and Masking. The foundation of any quality spray finish is meticulous preparation. Surfaces are cleaned, sanded, and degreased to ensure the coating adheres properly. Existing finishes are assessed, some may be lightly sanded to improve adhesion, whilst others require stripping. All surrounding areas are masked with protective coverings to prevent overspray. This step is labour-intensive but absolutely critical. Shortcuts here result in poor adhesion, peeling, and premature failure.

    Step Two: Primer and Base Coats. Once surfaces are prepared, a primer is applied to promote adhesion and provide a uniform base. The primer ensures the final colour coat covers evenly and bonds securely. After the primer cures, the first colour coat is applied. Professional spray application uses multiple thin coats rather than one thick coat, this approach ensures even coverage, better adhesion, and superior durability.

    Step Three: Final Coat and Curing. The final colour coat is applied once the base coat has cured sufficiently. This coat delivers the finished appearance and colour. After application, the work is left to cure fully, this timeframe varies depending on the coating type and environmental conditions, but typically ranges from 24 to 72 hours before normal use can resume.

    The three-step process is what separates professional results from amateur work. Each step builds on the previous one, and skipping or rushing any step compromises the final result. This is why professional spray finishing services command a premium compared to basic painting, the process is thorough, time-consuming, and the quality difference is visible.

    Minimising Disruption During Application

    Household disruption is a legitimate concern for homeowners, particularly those working from home or with young children. Professional spray finishing is designed to minimise disruption, but understanding what to expect helps households plan accordingly.

    Spray equipment generates noise, though modern equipment is quieter than older models. The noise level is comparable to a vacuum cleaner, noticeable but not deafening. Most work occurs during normal business hours, and the duration is measured in hours or a few days rather than weeks.

    Dust and overspray are the primary disruption concerns.

    How to Get a Quote for Your Project

    Getting an accurate quote for residential spray finishing requires providing clear information about the scope of work, the surfaces involved, and the desired outcome. The process is straightforward, but the detail you provide directly impacts the accuracy of the estimate.

    Best For
    Homeowners in West Sussex and the surrounding area wanting to refresh kitchen aesthetics, restore faded uPVC windows and conservatories, or modernise dated interior fixtures without the cost and disruption of full renovation or replacement.

    Frequently Asked Questions

    How long does a professional spray finish last on kitchen cabinets and exterior surfaces?

    A properly applied professional spray finish can last for several years on interior surfaces like kitchen cabinets when maintained correctly. Exterior finishes on uPVC and conservatories can also last for several years depending on weather exposure and maintenance. The durability depends on surface preparation, coating quality, and the three-step application process used by professionals to ensure optimal coating thickness.

    What makes professional spray finishing better than DIY or hand painting?

    Professional spray finishing delivers uniform coverage, superior finish quality, and faster application compared to hand painting. Professionals control spray patterns, coating thickness, and drying conditions to prevent drips, runs, and uneven colour. They also protect surrounding surfaces systematically, minimising damage risk to worktops and appliances, something difficult to guarantee with DIY methods.

    Can spray finishing work on old, weathered uPVC windows and doors?

    Yes, weathered uPVC can be spray finished successfully if properly prepared. The surface must be cleaned, sanded, and primed to ensure adhesion. Professional assessment is essential because severely damaged frames may require replacement instead. Professionals evaluate each frame’s condition and recommend the best solution before starting work.

    How much disruption should I expect during residential spray finishing?

    Spray finishing causes minimal disruption compared to full renovation. Most interior projects take a few days depending on surface area. Dust and odour are controlled through masking and ventilation. You can typically remain in the property, though the sprayed area should be avoided during application and drying. Professionals manage the timeline to minimise inconvenience, particularly for those working from home.

  • How to Modernise Dated Kitchen Units: A Step-by-Step Guide

    How to Modernise Dated Kitchen Units: A Step-by-Step Guide

    Table of Contents

    Last Updated: October 6, 2026

    Why Modernising Kitchen Units Mattrs

    Dated kitchen cabinets drain your home’s appeal. They make the whole room feel tired, even when everything else is new. Learning how to modernise dated kitchen units doesn’t require a full renovation or tens of thousands of pounds. Modern spray finishing transforms tired units into contemporary focal points in just days, not weeks.

    At Astral Coatings Ltd., we understand the desire to refresh kitchens across Sussex. Homeowners often assume they need to replace cabinets entirely. The truth is simpler: professional spray finishing delivers a durable, high-quality result.

    Modernising your kitchen units also protects your investment. A quality spray coating resists moisture, heat, and daily wear. This matters in kitchens, where steam, spills, and temperature swings test any finish constantly.

    The process itself causes minimal disruption. Your kitchen stays functional throughout.

    How to Prepare Kitchen Cabinets for Painting

    Preparation determines everything. Rushed prep leads to peeling, chipping, and a finish that disappoints within months. Proper preparation takes time, but it’s what separates professional results from DIY disasters.

    Clearing and Protecting Your Space

    Empty your kitchen completely. Remove every item from inside and on top of cabinets. Doors, shelves, and hardware all come off. This isn’t optional, it’s essential.

    Protect everything else in the room:

    • Cover worktops with heavy plastic sheeting, taped down securely
    • Drape appliances, flooring, and walls with dust sheets
    • Remove or tape off light switches and sockets
    • Close doors to adjacent rooms to contain dust and fumes

    This step takes several hours. It feels tedious. It’s the difference between a professional-looking finish and damaged appliances.

    Cleaning and Degreasing Surfaces

    Kitchen cabinets accumulate grease, dust, and cooking residue. Paint doesn’t stick to dirt. You must clean thoroughly.

    Use a degreasing cleaner on all surfaces. Work methodically across every door, frame, and shelf. Pay special attention to areas near the cooker, where grease buildup is heaviest.

    Rinse everything with clean water. Let it dry completely, at least 24 hours in normal conditions. Moisture trapped under paint causes adhesion problems and eventual failure.

    Sanding and Surface Assessment

    Light sanding removes the existing finish and creates a surface paint can grip. Use 120-150 grit sandpaper for most kitchen cabinets. Sand by hand or with an orbital sander, moving with the grain where possible.

    The goal isn’t to strip bare wood. You’re creating a slightly roughened surface. This takes patience but pays dividends in coating durability.

    Inspect closely as you sand. Look for:

    • Damage, dents, or deep scratches
    • Areas where the existing finish is peeling
    • Warped or swollen sections (common in older kitchens)
    • Loose joints or hardware attachment points

    Document any damage. Some issues need filler or wood repair before spraying proceeds.

    Kitchen Cabinet Paint Colours That Modernise Your Space

    Colour choice defines the entire look. Modern kitchens favour clean, contemporary palettes. The right colour makes dated units feel current and intentional.

    Neutral tones remain the safest choice. Soft greys, warm whites, and muted blacks create timeless, sophisticated backdrops. These work with any worktop, splashback, or appliance colour you choose.

    Deep, bold colours work well in kitchens with good natural light. Navy, charcoal, or forest green cabinets feel contemporary and upmarket. Pair them with brass or chrome hardware for maximum impact.

    Warm tones like sage, taupe, or soft terracotta suit traditional homes. They feel modern without clashing with period features.

    Avoid bright, saturated colours. They date quickly and feel less professional than muted, sophisticated alternatives. Test your chosen colour on a sample cabinet door first. See how it looks in morning light, afternoon light, and evening artificial light. Colour perception shifts dramatically depending on lighting conditions.

    Kitchen Cabinet Spraying: The Professional Method

    Spray finishing delivers results brush application cannot match. The finish is thinner and more even. Professional spraying applies multiple thin coats rather than fewer thick ones, which prevents drips, runs, and uneven coverage.

    The Three-Step Spraying Process

    Astral Coatings Ltd. uses a meticulous three-step process that ensures optimal coating thickness and durability.

    Step 1: Primer Application

    A quality primer bonds to the prepared surface and provides a base for topcoats. Primer fills minor imperfections and creates uniform colour coverage. This step is essential for long-term adhesion.

    Step 2: First Topcoat

    The first topcoat builds colour and protection. Sprayers apply this coat in thin, even passes, allowing proper drying time between applications. This prevents the finish from becoming too thick, which causes sagging and uneven coverage.

    Contact us on WhatsApp →

    Step 3: Second Topcoat and Protection

    The final coat provides durability and sheen. The finish hardens fully over several days, developing its final hardness and resistance to moisture and heat.

    Professional spray technician applying even coating to kitchen cabinet door with precision spray gun, showing fine mist application and protective masking in modern kitchen environment
    Professional spray technician applying even coating to kitchen cabinet door with precision spray gun, showing fine mist application and protective masking in modern kitchen environment

    Why Spraying Outperforms Brush Application

    Spray application atomises paint into a fine mist that settles evenly across every surface.

    Spraying also applies thinner coats. Thinner coats dry faster and more uniformly. This prevents the soft, tacky finish that sometimes results from heavy brush application.

    The finish from professional spraying feels smooth and looks factory-made. The sheen is consistent across every surface.

    Spray finishing also reaches areas brushes miss. Inside corners, panel edges, and decorative details receive complete, even coverage.

    Cost to Spray Kitchen Cabinets: What Affects Your Investment

    Several factors influence the total cost of modernising your kitchen units through spray finishing. Understanding these helps you plan realistically.

    Cabinet quantity and size matter most. Larger kitchens with more doors and panels cost more than compact galley kitchens.

    Existing finish condition affects preparation time. Cabinets in poor condition, with peeling paint, water damage, or heavy grease buildup, require more intensive prep work.

    Colour choice can influence cost slightly. Complex colours or special finishes cost more than standard options.

    Turnaround time affects scheduling. Rush jobs may incur additional charges.

    Hardware replacement adds to total investment. New handles, hinges, or knobs modernise the look further.

    Rather than estimating costs yourself, request a quote from Astral Coatings Ltd. Every kitchen is unique. A professional assessment identifies specific factors affecting your project and provides accurate pricing for your situation. Contact us on WhatsApp for a personalised quote based on your kitchen’s actual dimensions and condition.

    Common Mistakes to Avoid When Modernising Kitchen Units

    Most DIY attempts at how to modernise dated kitchen units fail because homeowners skip or rush preparation. You cannot spray over grease and dirt. The finish will peel within months.

    Choosing the wrong colour is another common error. Test colours in your actual kitchen lighting before committing. Paint samples on cabinet doors and observe them throughout the day.

    Inadequate ventilation during spraying creates problems. Fumes accumulate, and moisture doesn’t escape properly. Open windows, use fans, and ensure air circulation during and after application.

    Applying coats too thickly causes sagging, runs, and uneven drying. Multiple thin coats always outperform fewer thick coats.

    Touching the finish too soon ruins the result. Spray finishes require full curing time, typically 7-10 days before normal kitchen use. Resist the temptation to close cabinet doors or place items inside until the coating fully hardens.

    Using low-quality paint or equipment produces disappointing results. Professional-grade materials and equipment make a measurable difference in durability and appearance.

    Attempting to spray without proper masking and protection damages surrounding surfaces. Plastic sheeting, tape, and careful setup prevent costly mistakes.


    Modernising dated kitchen units transforms your home. Professional spray finishing from Astral Coatings Ltd. delivers durable, contemporary results. Our three-step spraying process ensures optimal coating thickness and protection, with careful surface preparation and meticulous attention to detail. The finish resists moisture, heat, and daily wear. Get started with Astral Coatings Ltd. and discover how spray finishing can refresh your kitchen.

    Frequently Asked Questions

    How long does a professional spray finish last on kitchen cabinets?

    The durability of a professional spray finish depends on the quality of surface preparation, the coating system used, and how well you maintain the cabinets. The three-step spraying process, which includes primer, base coat, and protective topcoat, ensures optimal coating thickness that resists chipping and peeling. Regular cleaning with appropriate products keeps the finish in top condition.

    Can you modernise kitchen units without removing doors and drawers?

    Yes. Professional spray finishing can be applied on-site with doors and drawer fronts in place, though removing them allows for superior coverage and faster drying. If doors remain attached, masking and protection become more detailed. Most professionals recommend removal for the best finish quality and to protect surrounding surfaces like worktops and appliances. The choice depends on your space constraints and how much disruption you can tolerate during the work.

    What kitchen cabinet paint colours work best for modernising dated units?

    Neutral tones like soft greys, warm whites, and muted greens create a contemporary look whilst remaining timeless. Deeper shades such as navy or charcoal add sophistication and hide marks well. Matt and satin finishes feel more modern than gloss. Consider your kitchen’s lighting and existing worktops, lighter colours open up small spaces, whilst darker colours suit larger kitchens with good natural light. Professional advice ensures your chosen colour complements your overall kitchen design.

    How much disruption will kitchen cabinet spraying cause in my home?

    Professional spray finishing causes minimal disruption. You’ll experience some noise from masking preparation and spray application, plus temporary kitchen access restrictions. Dust and fumes are controlled through proper ventilation and masking. Most daily routines can continue with minor adjustments. Professional teams protect your worktops, appliances, and flooring throughout the process.

  • Windows Sprayed: A Step-by-Step uPVC Spraying Guide

    Windows Sprayed: A Step-by-Step uPVC Spraying Guide

    Table of Contents

    Last Updated: September 27, 2026

    What You’ll Need Before Windows Are Sprayed

    Having the right kit ready before anyone picks up a spray gun is what separates a clean, factory-style finish from a messy one. When windows are sprayed, the prep materials matter as much as the coating itself. Astral Coatings Ltd. has spent over 30 years on interior and exterior decorating, so we know how quickly a job stalls when something basic is missing.

    Gather these before you start:

    The Health and Safety Executive guidance on respiratory protective equipment is worth a read before you choose a mask, because solvent-based coatings need proper filtration.

    One common mistake is buying a cheap spray unit and expecting a professional result.

    Step-by-Step: How Windows Are Sprayed

    Spraying uPVC windows follows three stages: prep and mask, clean and repair, then coat. Rushing any stage shows up in the finish, usually as drips, peeling or a patchy sheen.

    Professional decorator masking uPVC frames before windows sprayed
    Professional decorator masking uPVC frames before windows sprayed

    Step 1: Preparation and Masking

    Masking protects everything you don’t want coated. Cover glass, handles, hinges, seals and nearby brickwork with tape and film. A common mistake is skipping the seals, which then stiffen and crack once paint dries on them.

    Step 2: Cleaning and Minor Repairs

    uPVC holds a lot of grime. Wipe frames down with a degreaser, then sand lightly to give the surface a key. Fill any small scratches or gaps with a suitable filler and let it cure fully. If you skip this, the coating can lift within months.

    Step 3: Applying the Coating

    Apply a bonding primer first, then two or three thin topcoats. Thin coats beat one heavy coat every time. Keep the gun moving and overlap each pass by around half.

    Pro TipThe three-step process works because each layer bonds to the one beneath it. Spraying straight onto unprepared uPVC is the single biggest reason DIY jobs fail.

    uPVC Window Spraying Cost: What Affects the Price

    There’s no single figure for uPVC window spraying cost. Pricing depends on the number of windows, their size, the condition of the frames and how much masking is needed.

    Several factors move the price up or down:

    • Total window count and surface area
    • Whether frames are weathered or damaged
    • Access, such as upper floors or tight spaces
    • Colour choice and number of coats required
    • Whether doors or a conservatory are included

    For an accurate quote, it’s best to ask a specialist to assess the job directly rather than rely on a rough online estimate.

    The Best Paint for uPVC Windows

    The best paint for uPVC windows is a flexible, uPVC-specific coating with a bonding primer. Standard paint cracks as the plastic expands and contracts with temperature.

    Contact us on WhatsApp →

    The British Standards Institution on paint and coating standards sets out performance expectations for exterior coatings. Matching your product to those standards protects the finish.

    uPVC Restoration vs Replacement: Which Makes Sense?

    For most frames that are structurally sound, uPVC restoration beats replacement on cost and disruption. Replacement means new units, waste and days of work.

    Key TakeawayIf the frame is sound, spraying restores the look for a fraction of the cost of new windows.

    Safety and Protecting Your Home During Spraying

    Safety comes down to ventilation, protection and containment. Spray mist travels further than most people expect, so cover floors, worktops and furniture before you begin.

    The HSE guidance on safe handling of solvents explains why solvent-based products need careful ventilation. For indoor work, this matters even more.

    Common Mistakes to Avoid

    Most failed spray jobs trace back to a handful of avoidable errors.

    Conclusion

    Refreshing tired uPVC frames is far less disruptive than a full replacement.

    Astral Coatings Ltd. brings over 30 years of experience, a meticulous three-step spraying process and durable, weatherproof finishes to every job. We protect your surrounding surfaces and deliver optimal coating thickness for long-lasting results.

    Get started with Astral Coatings Ltd. and give your windows a factory-fresh finish without the cost of replacement. Contact us on WhatsApp for a quote.

    Frequently Asked Questions

    How long do sprayed uPVC windows last?

    The lifespan of a spray finish on uPVC depends on the quality of the coating, surface preparation, and exposure to weather. Regular cleaning with warm soapy water helps maintain the finish.

    Is it cheaper to spray uPVC windows or replace them?

    Spraying is usually cheaper than full replacement. Replacement involves new frames, glazing units, labour, and disposal costs, whereas spraying refreshes the existing frames. The exact uPVC window spraying cost depends on the number of windows, their size, condition, and access requirements. Spraying is often chosen when frames are structurally sound but faded or discoloured.

    Can you spray paint uPVC windows yourself?

    DIY spraying is possible but rarely achieves a professional finish. Professional equipment, correct surface preparation, and the right coating are essential for durability. Without proper masking, you risk overspray on glass, brickwork, and neighbouring surfaces.

    Does spraying uPVC windows add value to a property?

    A fresh, uniform finish can improve kerb appeal and make a property look better maintained, which may support its marketability. While spraying is not a structural upgrade, it can be a cost-effective cosmetic improvement.