Table of Contents
- Why Dust Control Matters When Spraying Kitchen Cabinets
- Preparing Your Space: The Foundation for Dust Prevention
- How to Sand Kitchen Cabinets Without Making a Mess
- Cleaning Cabinets Before Spraying: Essential Steps
- Protecting Surrounding Surfaces During Application
- The Spraying Process: Minimising Dust Exposure
- Removing Dust Nibs From Sprayed Finish
- Common Mistakes to Avoid
- Frequently Asked Questions
Last Updated: October 2, 2026
Why Dust Control Matters When Spraying Kitchen Cabinets
Avoiding dust during kitchen cabinet spraying isn’t just about aesthetics. A single dust particle settling on wet coating can ruin hours of work.
Dust nibs, those tiny specks embedded in the finish, are nearly impossible to sand out without damaging the underlying coat. Prevention is always cheaper and faster than repair. When you spray without proper dust control, you’re essentially gambling with your investment.
The good news: controlling dust during spraying is entirely achievable with the right preparation. It doesn’t require expensive equipment or professional-grade facilities. It requires discipline and a systematic approach.
Here’s what separates a professional-looking finish from a disappointing one: preparation. Most people spend 20% of their time preparing and 80% spraying. It should be the opposite.
Preparing Your Space: The Foundation for Dust Prevention
Your spray environment matters more than your spraying technique. A dusty workshop will produce a dusty finish, no matter how skilled you are.
Start by identifying your work area. Ideally, you’ll spray in a space where you can control air movement and seal off external dust sources. A garage with the door closed works. A kitchen with open windows does not.
Isolating the Work Area
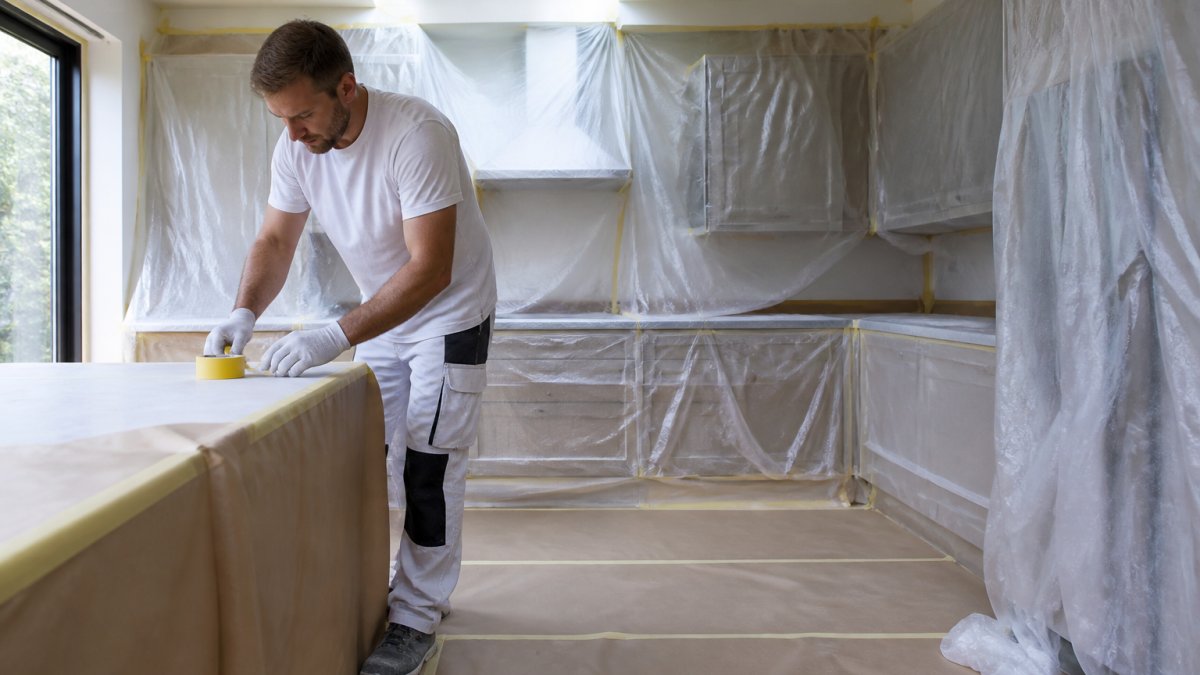
Seal your workspace completely. Use plastic sheeting to create barriers between your spray area and the rest of the property.
Cover doorways, windows, and any openings with heavy-duty plastic. Tape it down with masking tape. Leave no gaps. Even small openings allow dust to drift in during spraying.
Remove everything unnecessary from the room:
- Furniture
- Soft furnishings
- Cardboard boxes
- Anything that collects dust
If you must keep items in the space, cover them with plastic sheeting. Dust travels on air currents. A sealed workspace prevents external dust from entering and traps airborne particles you create during sanding.
Managing Air Movement
Air movement can work for you or against you. Uncontrolled air creates dust clouds. Controlled air removes them.
If you have extraction equipment, position it to pull air away from your work surface. Point it toward a window or outside. Never let air recirculate into the spray area.
In a sealed garage, open a window slightly on one side only. This creates gentle, directional airflow rather than chaotic turbulence. Air moves in one direction and out the other.
Avoid fans that blow air around the room randomly. They stir up settled dust and create swirling patterns that coat your cabinets with particles.
Humidity matters too. Dust clings to moisture. In very dry conditions, dust floats freely. In humid conditions, it settles faster.
How to Sand Kitchen Cabinets Without Making a Mess
Sanding creates more dust than any other step. How you sand determines how much dust you’ll fight during spraying.
Wet sanding eliminates airborne dust entirely. Dampen the cabinet surface lightly with a spray bottle before sanding.
Use fine-grit sandpaper, 220 grit or higher. Coarse grits create larger dust particles that are harder to control.
Sand in the direction of the wood grain. This produces less dust than sanding against the grain.
If you’re sanding by hand, work slowly. Rushing creates friction heat, which makes dust more likely to become airborne.
For larger cabinet runs, consider a sanding block with dust extraction.
After sanding, vacuum thoroughly. Use a vacuum with a HEPA filter, it captures fine dust particles that standard vacuums miss.
Cleaning Cabinets Before Spraying: Essential Steps
Clean cabinets are the foundation of dust-free spraying. Any residue left on the surface will be visible under wet coating.
Removing Loose Debris and Surface Contaminants
Start with a vacuum and brush. Remove all loose dust, cobwebs, and debris from the cabinet surfaces, edges, and corners.
Use a soft-bristled brush to dislodge dust trapped in grain or textured surfaces. Work systematically across each cabinet door and frame.
Wipe down with a damp cloth, not wet, damp. Water removes dust without raising the wood grain. Use a lint-free cloth. Regular cloths shed fibres that will end up in your finish.
For cabinets with grease or cooking residue, use a mild degreaser. Spray it on, let it sit for two minutes, then wipe clean. Rinse with a damp cloth to remove any degreaser residue. Let the surface dry completely, at least 30 minutes in normal conditions.
Using the Best Tack Cloth for Cabinet Painting
A tack cloth is your final defence against dust. It’s a sticky cloth that picks up particles no vacuum or damp cloth can reach.
Use a dedicated tack cloth made for paint preparation. These are available from any decorating supplier. Unfold it gently, they tear easily. Wipe the entire cabinet surface with light pressure. The cloth picks up microscopic dust particles that would otherwise land in your wet coating.
Replace the cloth when it becomes saturated with dust. One cloth typically covers 3-4 cabinet doors before it’s full.
Do this immediately before spraying. Don’t wait. Dust settles constantly. The longer you wait between tacking and spraying, the more dust lands on your “clean” surface.
Protecting Surrounding Surfaces During Application
Spray travels further than you think. Overspray drifts onto nearby surfaces and settles.
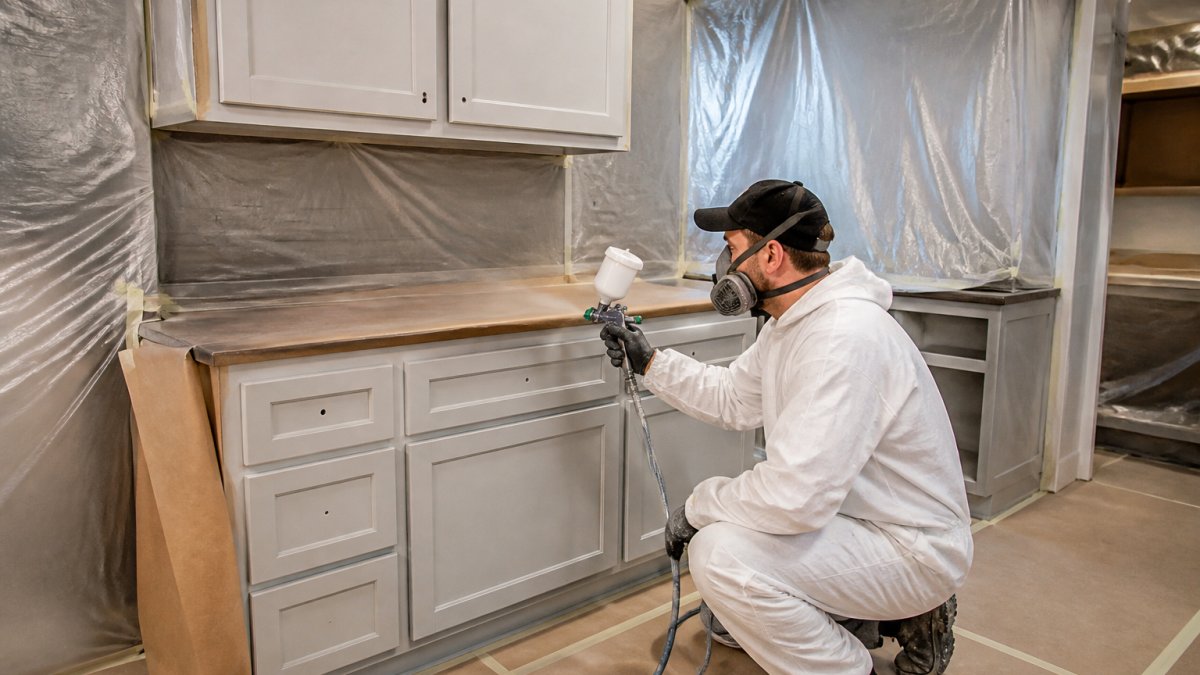
Mask everything around your work area. Use masking tape and plastic sheeting to create a perimeter. Extend the protection at least 1.5 metres in all directions.
Cover worktops with plastic sheeting taped down at the edges. Protect appliances with plastic bags or sheeting. Cover the floor with heavy-duty plastic or dust sheets.
Mask cabinet interiors if you’re only spraying the doors and frames. Overspray inside cabinets creates a rough finish that’s visible when doors open.
Use painter’s tape on edges where you want a clean line. Press it down firmly so coating doesn’t seep underneath. Remove tape while the coating is still tacky, not after it dries. Dried coating can peel away with the tape.
The Spraying Process: Minimising Dust Exposure
During spraying, dust is your constant enemy. Keep the spray area sealed and undisturbed.
Close all doors and windows before you start. Don’t open them during spraying. Every time a door opens, dust-laden air rushes in.
If you have extraction running, keep it on throughout the process.
Spray in smooth, overlapping passes. Jerky movements create turbulence that stirs up dust.
Apply thin coats rather than thick ones. Thick coats take longer to dry, giving dust more time to settle into the wet finish.
Between coats, resist the urge to open doors and check your work. Wait until the coat is fully dry. Dust exposure during drying ruins the finish.
If dust does land on a wet coat, don’t try to wipe it off. You’ll create a larger defect.
Removing Dust Nibs From Sprayed Finish
Despite your best efforts, the occasional dust nib will appear. Removing dust nibs from sprayed finish requires patience and the right technique.
Wait until the coat is completely dry before attempting removal. Sanding wet or tacky coating creates a larger defect.
Use fine-grit sandpaper, 400 grit or higher. Sand gently around the dust nib in a circular motion. The goal is to sand the nib flush with the surrounding surface without creating a depression.
Wipe away dust with a tack cloth. If the nib is removed but you’ve created a dull spot, apply a light mist coat over the area.
For severe dust contamination, light sanding of the entire surface followed by a final mist coat often produces the best results. It’s more work than spot repairs, but it guarantees a uniform finish.
Common Mistakes to Avoid
Most dust problems stem from skipped preparation steps. Understand these mistakes so you don’t repeat them.
Opening doors during spraying. Every time a door opens, dust-laden air enters.
Sanding without dust control. Aggressive dry sanding fills the air with particles.
Spraying in high-traffic areas. If people are walking around nearby, they stir up dust.
Not waiting between coats. Dust settles constantly.
Using low-quality masking materials. Cheap plastic tears easily. Use heavy-duty plastic sheeting and quality masking tape.
Spraying without adequate ventilation. Even in a sealed space, you need some air movement to remove overspray.
Avoiding dust during kitchen cabinet spraying comes down to one principle: control your environment completely.
Professional finishes aren’t the result of better technique alone. They’re the result of better preparation.
Refreshing kitchen cabinets yourself demands precision and patience. One dust particle in the wrong place can derail weeks of planning. If you’d rather leave this to professionals who’ve perfected the process, Astral Coatings Ltd. handles the entire project, from dust-free sanding through final protective coating. Contact us on WhatsApp to discuss your cabinet refinishing project and discover how professional spray finishing delivers results that last.
Frequently Asked Questions
How do professionals keep dust out of sprayed cabinet paint?
Professionals prevent dust contamination through a combination of techniques: isolating the work area with plastic sheeting and tape, using tack cloths to capture fine particles before spraying, maintaining controlled air circulation to prevent dust settling, and allowing adequate drying time between preparation and application. Proper surface cleaning, sanding with appropriate methods, and maintaining clean spray equipment are equally important. These steps work together to create a dust-free environment where coatings can cure without imperfections.
What is the best tack cloth for cabinet painting?
A quality tack cloth should be lint-free, lightly tacky, and designed specifically for paint preparation. Look for cloths made from cotton or synthetic materials that won’t shed fibres onto your cabinets. The cloth should pick up dust and sanding debris without leaving residue. When using a tack cloth, work gently across surfaces in one direction, then allow 15-30 minutes for any remaining tackiness to evaporate before spraying. Replace the cloth once it becomes saturated with dust or loses its tackiness.
Why do I keep getting dust nibs in my sprayed finish?
Dust nibs form when airborne particles settle on wet coating before it dries. Common causes include inadequate surface preparation, insufficient dust barriers, poor air circulation management, or spraying in dusty conditions. Each layer of your spray finish creates a sticky surface that attracts particles. Prevent this by thoroughly cleaning and tack-clothing surfaces before each coat, sealing your work area completely, controlling humidity and temperature, and allowing proper drying time. If nibs do appear, they can be sanded out and the area resprayed once the finish fully cures.
How long does cabinet spray coating last before peeling or chipping?
Durability depends on surface preparation quality, coating thickness, and the product used. To extend the life of your finish, avoid excessive moisture exposure, use gentle cleaning methods, and address any damage promptly.