
Table of Contents
- What You’ll Need Before Spraying Shopfronts
- Preparing Your Shopfront for Spray Coating
- Step-by-Step Process for Spraying Shopfronts
- Benefits of On-Site Spray Painting for Commercial Premises
- Understanding Commercial Shopfront Refurbishment Costs
- How to Choose a Commercial Spray Painting Contractor
- Common Mistakes to Avoid When Spraying Shopfronts
- Frequently Asked Questions
Last Updated: October 2, 2026
What You’ll Need Before Spraying Shopfronts
To spray shopfronts for commercial premises, you need specific equipment and materials. Getting these right from the start prevents delays, poor finishes, and costly mistakes. Preparation is where quality projects begin.
Essential Equipment and Materials
You’ll need a professional spray system to apply coatings evenly. HVLP (high-volume, low-pressure) sprayers work well for most shopfront applications. Airless sprayers deliver faster coverage for larger areas. Choose based on your surface size and the coating type you’re using.
Essential materials include:
- Primer suitable for your substrate (metal, uPVC, wood, or composite)
- Top coat paint or specialist coating for commercial use
- Thinners or reducer for your specific product
- Dust sheets and protective coverings
- Masking tape and plastic sheeting
- Sandpaper in various grits (120, 180, 220)
- Cleaning agents and degreaser
- Spray gun tips and filters (have spares)
- Paint trays or buckets for mixing
Quality matters here. Cheap equipment clogs, sprays unevenly, and wastes material. Professional-grade sprayers cost more upfront but deliver consistent results and last for years.
Safety Gear and Protective Equipment
Spray painting generates fine mist and fumes. Proper protection keeps you safe and prevents health issues down the line.
Required safety equipment:
- Respiratory protection (P3-rated mask or powered respirator for solvent-based coatings)
- Safety glasses or goggles to protect eyes from spray
- Chemical-resistant gloves (nitrile or butyl rubber)
- Protective coveralls or clothing you don’t mind staining
- Steel-toed boots with slip-resistant soles
- Ear protection if using compressors or high-noise equipment
The respirator is non-negotiable. Breathing paint fumes causes headaches, dizziness, and long-term respiratory damage. A proper respirator costs £30-£80 and lasts through many projects.
Preparing Your Shopfront for Spray Coating
Preparation determines whether your finish lasts years or peels within months. Rush this phase and you’ll regret it. Take time to assess, clean, and protect properly.
Surface Assessment and Cleaning
Before spraying, inspect the entire surface. Look for cracks, peeling paint, rust, or damage. These need repair before coating.
Steps for surface assessment:
- Walk the full shopfront in daylight. Note any problem areas.
- Feel the surface with your hand. Loose paint will crumble or flake.
- Check for rust on metal frames. Light surface rust can be sanded. Deep rust needs grinding or replacement.
- Identify any gaps or crevices where moisture hides.
Cleaning removes dirt, grease, and old coating that prevent adhesion. A poor bond means your new finish fails quickly.
Clean the surface thoroughly:
- Degrease with a suitable chemical cleaner for your surface type
- Wash with water and allow to dry completely
- Sand the surface to remove gloss and create texture for adhesion
- Wipe down with a tack cloth to remove dust
- Allow 24 hours drying time before priming
Moisture is your enemy. Even slight dampness under the coating causes blistering and peeling. On damp days, allow extra drying time.
Masking and Protection
Spray reaches areas you don’t intend to coat. Masking protects adjacent surfaces and keeps the work area clean.
Masking strategy:
- Cover windows completely with plastic sheeting and tape
- Protect door frames, handles, and hinges with tape and plastic
- Shield any signage, lights, or fixtures with dust sheets
- Lay protective coverings on the ground to catch overspray
- Tape all edges carefully. Gaps allow spray to creep underneath.
- Use quality masking tape. Cheap tape lets spray seep under edges.
This looks tedious, but it saves hours of cleanup and prevents damage claims. A single scratch on a customer’s door or window is expensive to repair.
Step-by-Step Process for Spraying Shopfronts
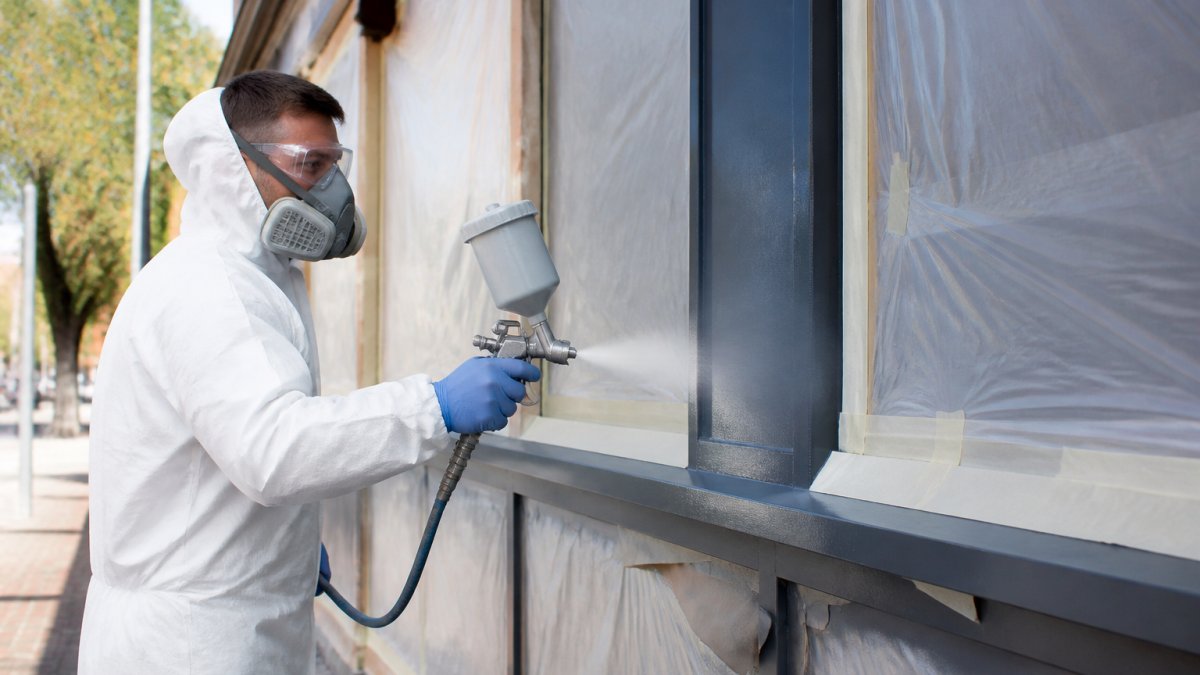
The actual spraying follows a proven sequence. Each layer builds on the last. Skip steps or rush them and the finish suffers.
Priming and Base Coat Application
Prime first. Primer seals the surface, improves adhesion, and provides a base for topcoat. Skip primer and your topcoat won’t stick properly.
Primer application:
- Thin the primer according to manufacturer instructions. Consistency matters.
- Test spray on a scrap surface first. Adjust spray pattern and pressure.
- Apply primer in thin, even coats. One heavy coat is worse than two light ones.
- Spray in overlapping passes, working top to bottom.
- Allow full drying time between coats (check product instructions, typically 2-4 hours).
- Sand lightly between primer coats with fine-grit paper (220) to improve adhesion.
Most shopfronts need 2 coats of primer for proper coverage. Metal and bare wood require primer. Previously painted surfaces may need only 1 coat if the existing finish is sound.
Applying the Topcoat
The topcoat is what people see. It provides colour, protection, and durability.
Topcoat application:
- Ensure primer is fully dry and sanded smooth.
- Thin topcoat to the correct viscosity (test on scrap first).
- Apply in thin, even coats with consistent overlaps.
- Maintain proper spray distance (typically 25-30 cm from surface).
- Work methodically top to bottom, side to side.
- Apply 2-3 coats depending on colour and coverage.
- Allow proper drying between coats.
The key is patience. One thick coat runs and sags. Multiple thin coats build a smooth, professional finish. Each coat should take 15-30 minutes to apply, depending on area size.
Temperature and humidity affect drying. Cold or damp conditions slow drying and can cause issues. Ideal conditions are 15-25°C with humidity below 80%.
Final Inspection and Touch-Ups
Once dry, inspect the entire surface. Look for drips, sags, thin spots, or missed areas.
Inspection checklist:
- Check for runs or sags (especially on vertical surfaces)
- Look for thin spots where primer shows through
- Identify any dust particles or debris in the finish
- Check edges and corners for complete coverage
- Ensure colour is uniform across the entire shopfront
Minor imperfections can be sanded smooth and spot-coated. Sand lightly with fine paper (320 or finer) and apply a thin topcoat to the area.
Allow full cure time before removing masking. Topcoats typically cure fully in 7-14 days depending on product type. Don’t rush this. Premature removal of tape can damage the fresh finish.
Benefits of On-Site Spray Painting for Commercial Premises
Spray painting offers advantages over traditional brush or roller application. For commercial shopfronts, these benefits directly affect your business.
On-site spray painting delivers:
- Faster application, Spray covers large areas in hours, not days
- Smoother finish, No brush marks or roller texture visible
- Better adhesion, Spray atomises coating for superior bonding
- Uniform colour, No variation between hand-applied sections
- Professional appearance, Customers notice the quality immediately
- Minimal disruption, Work completes quickly, reducing business downtime
- Durability, Proper spray application with optimal coating thickness lasts longer than brush work
The finish quality is the main advantage. A professionally sprayed shopfront looks new, not refreshed. This impression matters for customer perception and brand image.
Understanding Commercial Shopfront Refurbishment Costs
Commercial shopfront refurbishment costs vary based on surface area, condition, and coating type. Several factors influence the final price.
Cost drivers include:
- Surface size, Larger shopfronts cost more to prepare and spray
- Existing condition, Heavily damaged surfaces require more prep work
- Substrate type, Metal, uPVC, wood, and composite require different primers
- Coating quality, Premium coatings cost more but last longer
- Access difficulty, Hard-to-reach areas take longer and cost more
- Downtime requirements, Rush jobs may cost extra
For an accurate quote, measure your shopfront dimensions and photograph the current condition. Provide details about the substrate material and any problem areas. Professional contractors assess the work scope and provide detailed pricing based on your specific situation.
How to Choose a Commercial Spray Painting Contractor
Selecting the right contractor determines whether your shopfront looks professional or disappointing. Poor workmanship is expensive to fix.
What to evaluate when choosing a contractor:
- Experience with commercial shopfronts, Ask for examples of previous work
- Insurance and liability coverage, Verify they’re properly insured
- Professional training, Look for certifications or academy training
- References and reviews, Check customer feedback and testimonials
- Detailed quotation, Get specifics about prep work, materials, and timeline
- Warranty or guarantee, Reputable contractors stand behind their work
- Health and safety compliance, They should follow proper safety protocols
Common Mistakes to Avoid When Spraying Shopfronts
Common errors include:
Skipping surface preparation, This is the biggest mistake. Poor prep leads to peeling, poor adhesion, and short finish life. Take time to clean, sand, and repair properly.
Frequently Asked Questions
How long does shopfront spray painting last?
Professional spray coatings on shopfronts typically last 5-10 years or longer, depending on weather exposure, surface preparation, and coating quality. A properly applied three-step process with primer, base coat, and topcoat provides durability that withstands rain, UV exposure, and temperature changes. Regular maintenance and cleaning extend the lifespan significantly. Factors like coastal salt spray or heavy foot traffic may require earlier recoating.
What’s the difference between spray painting a shopfront and replacing it entirely?
Spray painting costs considerably less than replacement whilst delivering a refreshed appearance. Replacement involves removing old frames, disposing of materials, and installing new units, which disrupts business operations for days or weeks. Spray coating takes days, not weeks, minimises downtime, and avoids the expense of new materials and installation labour. However, replacement suits severely damaged frames beyond repair. Spray coating works best on structurally sound shopfronts needing aesthetic renewal.
What surfaces can be spray painted on commercial shopfronts?
Spray coating works effectively on uPVC frames, aluminium, timber, and composite materials commonly found on commercial shopfronts. The process suits doors, windows, frames, and fascias. However, glass surfaces require masking to prevent coating. Heavily rusted or corroded metal may need specialist treatment before spraying. The key is proper surface preparation, cleaning, degreasing, and light sanding, to ensure the coating adheres correctly regardless of material type.
Do I need planning permission to spray a commercial shopfront?
Most shopfront spray coating projects do not require planning permission, as you’re refinishing existing structures rather than altering them structurally or materially changing their appearance. However, if the new colour significantly alters the building’s character or if your premises is listed or in a conservation area, check with your local planning authority first. Some conservation areas have strict guidelines on external finishes. It’s wise to confirm before starting work to avoid complications.